recipe

Hootie and the Blowfish.. and Couscous :)

Blow Fish with Couscous


Quick stop today! Have you tried the Blowfish before? No not the band (although those stories are welcome) but the fish.. :) yes, from that same family as Puffer fish but not quite as sinister!

Blowfish is a white fleshed, mild flavored fish that easily picks up the flavors that you coat it in. It is much like chicken in that respect as also in the way you eat it.. like a drumstick.

For a quick meal, I paired Smoked Paprika and Oregano Breaded Blowfish with a fresh Couscous with cucumber, sundried tomatoes and walnuts.


Smoked Paprika and Oregano Breaded Blowfish
(serves 2)

4 plump blowfish, cleaned and de-finned
2 tsp smoked paprika
salt and pepper as needed
4 T flour for dredging (you can use rice flour to go glutenfree)
1 tsp oregano
oil as needed for sauteeing

Season the fish with salt, pepper and paprika. Mix the oregano into the flour and lightly salt it.

Heat oil on medium high in a heavy bottomed frying pan. Touch the edge of a fish to the oil, if it sizzles then we are ready to go. Using the tails to hold the fish, lightly pat both sides in the flour. Dust away excess flour and place in frying pan. Do not touch for 2 minutes. Gently lift turn over and cook for 4 minutes. Serve immediately.

Quick lunches and Seafood

Stuffed Squid

Summer is the time for most things perfect.. beautifully ripe produce and the high season for meat. Except it is perhaps a bit too hot, in many places, to do much with all that good stuff.

Easy, quick meals that do not require prolonged periods of standing over the flame are my way of cooking through these few months of heat. Yes, and things that require the oven to be turned on are kept to necessity.

Crawfish Boil


Seafood becomes the go to choice of meat. It's fresh, ridiculously succulent and flavorful and cooks in a jiffy.. not to mention the versatality of use.. from salads to, full blown gourmet entree that you can put together with minimal sweat (pun intended!)

Sometime back, my favorite seafood market was carrying fresh crawfish. So we had a simple lunch of a couple of pounds of the shell fish cooked in a spicy, Creole inspired broth.

Another day, as I was perusing one of my few cookbooks, I came across a Spanish recipe for Stuffed Squid, which, made quite a lot of sense and packed a whole lot of flavor. That's my recipe today!

Stuffed Squid sliced


Enjoy, and stay cool (or warm!) this week! :)


Stuffed Squid in Saffron Tomato Sauce

For the Squid:
8 baby squid, cleaned, tentacles removed and reserved
4 shallots, diced fine
3 cloves of garlic, minced
3 T golden raisins
1/4 cup bread crumbs
salt and paprika for seasoning

For the sauce:
1 medium red onion, diced
2 medium tomatoes, diced small
3 T dried apricots, chopped
2 cloves garlic, minced
1 tsp smoked paprika
1/2 tsp saffron
1/2 cup stock
salt, pepper and oil as needed
cilantro, red onion, tomatoes for garnish

To prepare the squid:
Finely chop the tentacles and mix all the stuffing ingredients together. Season with salt and paprika. Gently fill the squid cavity with the stuffing taking care to not be greedy! {the bodies shrink while cooking, so overfilling runs the risk of bursting at the seams}. Lock the ends with toothpicks. Set aside until ready for cooking.

To make the sauce, saute the garlic and onion in oil. When soft add tomatoes, apricots, saffron aand all the seasoning. Gently place the stuffed squid in the pan and pour the stock over. Cover with lid and cook for 15 minutes, then lift the lid and cook for another 10 minutes. During this time, turn the squid around for even cooking. Serve immediately garnished with diced onion, tomatoes and cilantro sprinkled.

Pâté et Pain - Daring Cooks Bake in June

Chicken & Mushroom Terrine with Italian Bread 2

Yes indeed! We were asked to bake this month for the Daring Cooks Challenge. I am not all sure if it should not have been one for Daring Baker's but, I suppose, given it is a savory dish, it was a cooking challenge?!....

Our hostesses this month, Evelyne of Cheap Ethnic Eatz, and Valerie of a The Chocolate Bunny, chose delicious pate with freshly baked bread as their June Daring Cook’s challenge! They’ve provided us with 4 different pate recipes to choose from and are allowing us to go wild with our homemade bread choice.

We were challenged to make atleast one Pâté from the listed options and one bread of our choice. Most of the recipes for pâtés use liver, which, I quite dislike. So, I scoured around for a recipe that did not use innards and such. Quite accidentally, I remembered a book I had bought a while back in an effort to make chicken more fun to eat (for me!). There I found a recipe for a Terrine made with chicken meat and mushrooms...

Chicken & Mushroom Terrine

There is some debate on what is and isn't a Pâté. You may have noticed, I mentioned Terrine before; that's what I made..

Our hostesses said - Technically, a terrine is a baking recipient, usually ceramic or porcelain, with a lid – but it can also refer to the contents of the recipient. And some of the pâtés we looked at were designed to be unmolded onto a dish and then sliced, while others were meant to be left in the jar or baking dish they were prepared in, and merely used as a spread.

Wiki concurs - In French or Belgian cuisine, pâté may be baked in a crust as pie or loaf, in which case it is called pâté en croûte or baked in a terrine (or other mold), in which case it is known as pâté en terrine.

Italian Bread

I decided to proceed with my Chicken and Mushroom Terrine recipe! For authenticity, I did bake it in a porcelain mold... I used chicken thigh and leg meat and combined it with red wine sauteed portobellos. Now, the recipe I was adapting called for fresh herbs and since I was making this late in the night, I was a bit short on most herbs.

I used what I had, which made for interesting flavors. I used mint and Fenugreek. Fenugreek is a bitter herb that is used a lot in Eastern cuisine. We use the leaves and seeds for cooking and it's bitterness is supposed to be good for the digestive system (or perhaps that was just made up so children would eat it!). Nevertheless, it does have much nutritional value.

As to the bread, Mr.FSK does not much gravitate towards the crusty varieties. So, I chose a bread with a softer crust. I have wanted to try baking an Italian loaf and this seemed the opportune moment. I followed Peter Reinhart's recipe to the T (Although I did substitute a third of the flour with whole wheat). We loved the bread. It was soft, filling and flavorful. And, the house was filled with such lovely aromas! :))

Chicken & Mushroom Terrine with Italian Bread

Verdict: A fun challenge, especially since I love to bake, even though, it was a bit hot around here for this exercise. I enjoyed the pâté but, perhaps, because I did not use the fattier innards, it was a tad dry and not creamy like I am used to it being. If I ever get the courage to cook liver and such, I may give it another try.. The bread, on the other hand, is definitely a repeat! :)

P.S. : I am sending my Italian loaf to YeastSpotting..


Chicken and Mushroom Pâté

2 shallots, chopped
2 generous cups, mushrooms, chopped (no stems)
1/4 cup dry, red wine
2 chicken thighs, skinned and chopped
1 egg
2 T fresh breadcrumbs
2 T chopped mint
4 T chopped fenugreek

optional: For serving, pistachios, tomatoes and mint

Preheat oven to 350F.

Cook the shallots and mushrooms with wine in a sauce pan over low heat until the vegetables are soft and the mixture is dry. Transfer to a food processor along with the chicken, egg, breadcrumbs and seasoning and process coarsely. Add the herbs and pulse briefly.

Spoon into greased molds and smooth the surface. Cover with foil and bake fpr 30-35 minutes until juices are no longer pink. Remove from oven and place a weight on top leave to cool and then chill.

Serve with roasted pistachios, thinly sliced tomatoes and garnished with mint.

Weekday Lunch - Pizzich

Pizzich assembly copy

I am not much of a solo eater.. I mean, I really don't like it or see the point of it. These days, unfortunately, I am on my own at meal times, a lot more than I'd like. Mr.FSK is travelling most of the week, which, means I fend for just myself, which, not only is boring but downright inspiration-sapping...

I can easily get by the day with cereal, instant noodles or at the most, easy to make Indian snack items, which, really make quite a satisfying meal! But, this week, I really craved something more substantial. And, I didn't even mind putting in all that effort for just me!

So, I made a open face sandwich on a pizza style flat bread base; and hence, the name Pizzich! Over the bread, I slathered spicy aioli (made with spicy sundried tomato paste, mayo and lemon juice), smoked pepper turkey, arugula, more sundried tomato, red onion. Then, in the cooling oven (from the flat bread making), I melted provolone cheese and we were all set for a simple yet sumptuous lunch!

Pizzich assembly - side view


Flat Bread
(makes 2 sandwich bases)

1 cup all purpose flour + more for dusting
1/2 tsp yeast
1/2 tsp salt
1/3 cup warm water + more if needed
1 T olive oil

Stir dry ingredients, including yeast, in a large bowl. Add water and olive oil, stirring mixture into a ball. Knead the dough for a minute or two until you get a nice elastic dough. Transfer the dough into a lightly oiled bowl, turn to coat all over. Cover the bowl with plastic wrap and leave it in a warm place till it doubles in size (one to two hours).

When the dough has risen, gently punch it down with the palm of your hands. Fold the dough into an approximate ball shape, and let it sit under that plastic wrap for 20 more minutes.

Divide the dough into two parts. Stretch each part into an approximate oval shape of the length you would like. Transfer to a baking sheet and bake in an oven pre-heated to 450F for 10-15 minutes until a bit puffed and golden.

Remove and arrange sandwich. If you want to melt cheese, stick the assembled sandwich back into the oven for about 3-4 minutes, long enough for it to melt and you are all set with a scrumptious lunch!

This flat bread is being sent to my favorite Yeastspotting team!

Mediterranean Baked Red Snapper and Aussie Trivia


Ok! Let's start with a trivia question from my trip. Tell me where the below photo was taken ...

Picture 603-2 copy

While you ponder the photo, let me just say .. I am back! :) Well, I seem to be saying that every other month!! Hmmm... Anyway, after almost a month away from home (and my kitchen) I am back to wearing clothes from the closet rather than the crumpled suitcase stuff. OK! I really can't complain... We spent all that time living in 5 star hotels and luxurious resorts. Still, I am glad to be back on home ground..

The travelogue is due.. I am still sifting through the pile of photos I took during the trip. Meanwhile, I did not want to be absent from my space here. I have not yet gotten into the full swing of cooking, photographing, posting... So, while I am still recovering from the jetlag, I leave you with a dish that I made before I left - Mediterranean Whole Baked Red Snapper.

Mediterranean Whole Baked Snapper

I found some gorgeous snapper at my seafood store and immediately grabbed one. I love snapper, one of the few fishes I can eat without a fuss! It's mild flavored, cooks easily, can be flavored with pretty much any seasoning and when fresh has a slight sweetness that is quite enticing..

I have a fascination with cooking fish whole. I don't often do it but I love the way it looks on the table (ofcourse ignoring that eye!). For this one, I made a simple Mediterranean influenced marinade with olives, coriander, garlic, capers and olive oil. To make a complete meal of it, I baked the fish with red peppers and red onions. The juices from the fish and marinade flavor the veggies as well making it a nice wholesome meal. I served this fish over lemon rice .

Mediterranean Whole Baked Snapper

Zucchini-Cocoa, Lime-Ginger and Smoked Salmon Mousse Verrine - Velveteers March 2010

Verrine

The Velveteers band again. This month we decided to challenge ourselves with making savory Verrines.

A verrine is a confection, originally from France, made by layering ingredients in a small glass. It can be either sweet or savoury, making a dessert or snack (source: Wikipedia).

Around the blogosphere, there have been many a verrine showcased but they were mostly of the sweet kind. And, so, we decided to go savory (I must say, that, was well received by Mr. FSK as well!). To push the envelope even more, each of us, Pam, Al, Aparna and I, chose one ingredient that must be used in our verrine. So we came up with - salmon, chocolate, cheese and squash; quite an eclectic combination, especially with the chocolate throwing one off the loop!

Verrine from top

I have long wanted to make verrines and have dreamed up quite a few flavor combinations, sweet and savory, that I have jotted down as drafts in my mailbox, my virtual notes diary. I had even bought glasses for them a couple of months back. But, this was the first I was actually executing. So, I was really thrilled and looking forward to it.

I was reasonably sure on how to use the squash, salmon and cheese but the chocolate was testing me quite a bit. Finally, I decided to use cocoa and pair it with zucchini (for the squash) because honestly, I could not think of anything to pair with that made sense with the rest of the ingredients.

Verrine 1

I had decided to make a Zucchini-Cocoa Mousse and Salmon Mousse. However, they did not quite seem to just go with each other on their own. I felt there needed to be a coordinating layer or sorts. When I tasted the zucchini-cocoa mousse, I felt like it needed a bit of kick. So, I went back to the drawing board.

I wanted something light so as to not overpower either the zucchini (which is quite delicate in flavor) or the salmon and yet connect them seamlessly. Citrus popped into my head as did ginger. Both, I think pair very well with zucchini and salmon individually and I figured that should work. So, became my middle layer of Lime and Ginger Mousse.

I made the zucchini and lime layers with whipped cream and used Cream Cheese to make the salmon mousse, lending it a richer texture. To top it off, I made a chilli-cocoa crusted zucchini chip.

Verrine 3

Verdict: The verrine was really good. The flavors came through individually and melded well together. The citrus kick was just enough to lighten the richness of the salmon mousse and brighten the zucchini. I think the chip was a bit overpoweringly bitter, probably because I used a lot of cocoa. Next time I think I'll sweeten it with some honey for a mellower flavor. All in all, Mr. FSK polished them off eagerly; So, I call it a success!


Zucchini-Cocoa, Lime-Ginger and Smoked Salmon Mousse Verrine
(serves 2)

Zucchini-Cocoa mousse:

1 zucchini, sliced; reserve some long strips for the chips
2 tsp unsweetened cocoa powder
1 tsp dried zucchini powder
1/2 cup whipping cream (you will use only half of it, reserve the other for the 2nd layer)
1/2 tsp of gelatin or agar-agar
1 T hot water
salt and lemon pepper per taste

Blanch the zucchini in hot water until translucent. Transfer immediately to ice cold water to retain the green color. Let it cool. Meanwhile, dissolve gelatin in a tablespoon of hot water.

Puree the cooled zucchini with the gelatin water to a smooth texture. Fold in cocoa, dried zucchini powder and season with salt and pepper. Whip the cream to stiff peaks and fold in half of it to the zucchini mixture.

Divide the zucchini-cocoa mousse equally between two glasses. Cover with plastic wrap and refrigerate for atleast 4 hours to let it set.

Note: You can make zucchini powder by thinly slicing zucchini and letting it sit in an off oven overnight or until it has completely lost it's moisture content and then grinding it to a fine powder.


Lime-Ginger Mousse:

zest of half a lime
juice of half a lime
1/4 tsp gelatin
1 inch chunk of ginger, grated very fine
remaining half of whipped cream from above
salt to taste

Combine the zest, juice and ginger. Add the gelatin and heat the mixture until the gelatin dissolves. Season with salt. Fold in the whipped cream and layer over the zucchini mousse layer. Let set in the refrigerator for atleast 4 hours.

Smoked Salmon Mousse:

3 T smoked salmon of your choice + more for garnish
3 T cream cheese at room temperature
1 T heavy cream
1 T hot water
1/4 tsp gelatin
salt and pepper to taste

Dissolve the gelatin in the hot water. Whip all the ingredients together to make a smooth, creamy mixture. Pipe into the glasses over the lime mousse layer. Allow to set for atleast 4 hours.

Chilli-Cocoa Crusted Zucchini Chips
(this is the modified version based on my experience and what I think will work better)

2 zucchini slices, sliced lengthwise with skin on
1 tsp unsweetened cocoa
1 tsp paprika
2 tsp honey
1/4 tsp salt

Mix together the honey, cocoa, paprika and salt and rub the zucchini slices generously. Cover with wrap and let marinate for a few hours. Deep fry them to crisp and sprinkle with sea salt crystals.


--------------------------------------------------------------------------------

Velveteers was started by Aparna, Asha, Alessio and Pam, who are passionate about different cuisines and food in general. Each month, we will attempt a new dish and share our experiences and the recipes we used. If you’re interested in joining the Velveteers, please feel free to drop by our food blogs and leave a comment.

Do, check out what the other Velveteers have created:

Alessio - http://recipetaster.blogspot.com/

Indian Inspired Carrots and Lentil Soup

Carrot and Lentil soup 3

Sometimes, there is nothing better than a simple soup to satisfy the soul. A soup that is easy to make, with familiar flavors but presented differently, that warms you from the inside on a cold, cold day.

Weekends are mostly lazy time. There are days when I wake up with a whole elaborate meal planned out in my head all dreamed up over the course of my restless sleep, muttering about ingredients and sauces and stuff. And, more often, I wake up and open the refrigerator hoping there is something that can be whipped up into something else without a whole lot of effort.

So, when I saw the bag of sweet carrots and pretty much nothing else in the fridge, I stared at it for a while. The idea of heading to the grocery for more stuff didn't appeal. It was one of those muggy mornings and even around noon I was still too groggy (we live such happening Friday nights, you see... slothing in front of the tube and mindlessly watching re-runs of Grey's Anatomy.. very exciting stuff!).

Carrot and Lentil soup-1

Anyway , for as long as I remember, I have not like cooked carrots. I just don't like the texture. So, well, finally, after what seemed like eternity (now that I think back.. at that time.. it seemed much more spontaneous..), it struck me that I could make soup with perhaps something else to add more body to it. More foraging and hazy thinking later, I had an 'Aha' moment. Why not make a dal type soup with carrots. Perfect! It's simple to make. I love dal flavors and it's different without being shatteringly jolting...

So, there it was.. a simple soup with red lentils and pureed sweet carrots with a touch of garam masala for spice and extra warmth. Poured over day old crusty bread and topped with Parmesan it was a fabulously easy lunch and so satisfying too!


Carrot and Lentil Soup

1/2 cup red lentils, washed and drained
1 cup sweet carrots
1/2 medium onion, diced
1 clove of garlic, minced
1/2 tsp turmeric powder
1 tsp cumin powder
1/4 tsp garam masala
1 cup water
fresh grated parmesan, as needed
day-old baguette (optional)
salt and pepper as needed
olive oil for garnish


Par boil the carrots in a pot. Drain the carrots and reserve the cooking liquid. Cook the lentils in the carrot water with the turmeric until completely cooked.

Meanwhile, saute the onion and garlic in olive oil. Add the cumin and garam masala and cook for a couple of minutes. Add in the carrots and lightly toss to coat with the spices. Once the dal is cooked, add it to the mixture. Cook for 5 more minutes to allow the flavors to blend.

Puree the mixture to the consistency you like. Add the puree back to the pot along with the water and bring to a boil. Simmer on low for 10 minutes. Season to taste.

To serve, place a couple of pieces of day old crusty bread at the bottom of the bowl. Pour the hot soup over the bread. Drizzle a bit of olive oil and garnish with sliced raw carrots and parmesan.

Tiramisu for Daring Bakers February 2010

Tiramisu Close up

The February 2010 Daring Bakers’ challenge was hosted by Aparna of My Diverse Kitchen and Deeba of Passionate About Baking. They chose Tiramisu as the challenge for the month. Their challenge recipe is based on recipes from The Washington Post, Cordon Bleu at Home and Baking Obsession.

Weird, how someone, somewhere reads your mind, isn't it? Take for instance, this Daring Bakers challenge. I have been meaning to make 
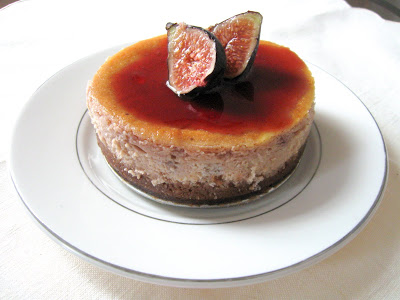
Tiramisu ever since I first saw it so prettily displayed at our neighbourhood Italian bakery. Gorgeous individual portions of, what to me looked like, layered mousse and biscuits. I wanted to recreate all that lovely-ness. Now, just how did Deeba and Aparna know my inner mind workings, I don't know. Perhaps, there is some sort of metaphysical connection between us... Hmmmmm..

So, if you are wondering why I am rambling on about minds, metaphysics and such... It's just the influence of Dan Brown's latest in the Langdon series. He has opened my eyes to this whole new (to me) world of "Noetic Science". Apparently, the field really exists and not a mere figment of his imagination (oh!! soo many puns in that sentence!). I googled.. Even Wikipedia has an article on Noetic Theory (Quid Pro Quo!). The basic hypothesis (and belief) behind the science is that the human mind is capable of physical change through the power of thinking!

Rather cool, I think. Well, we'll just have to wait and see how much of it can be scientifically proven. So, anyway, the book is all over it. And Mr. Brown, being who he is draws a ton of parallels between it, the Masons and the religions of the world. Decent book; I am about two-thirds through it and while not compelling or un-put-down-able, it's an interesting read. Maybe, there will be a twist in the end...

Tiramisu

Anyway, back to the subject of the post, the 
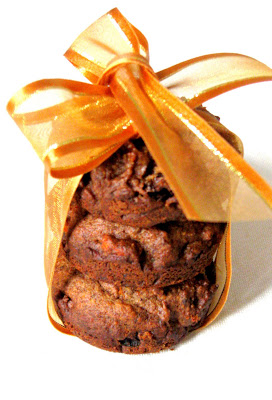
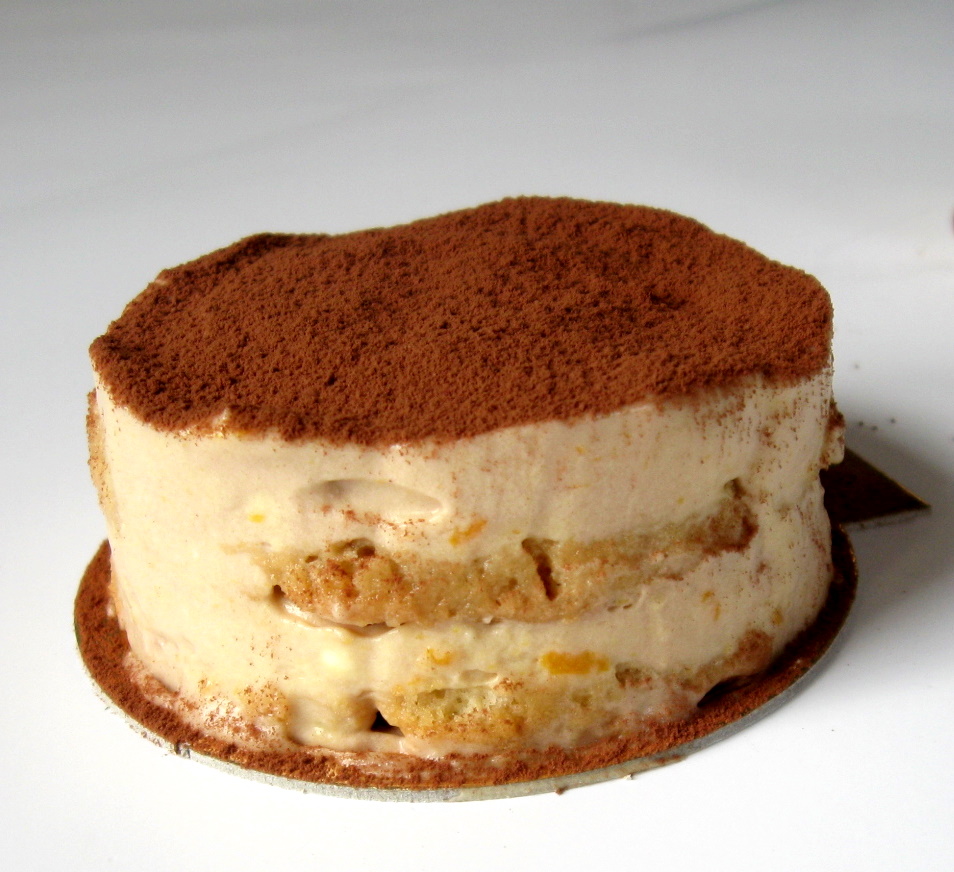
Tiramisu. I chose to make individual portions for two reasons. One, that's how it looks in the store. Two, I had been looking for an opportunity to use the pastry rings that Deeba had sent me when I was in India. It's was a pre-ordained match - the rings and a challenge co-hosted by her! Circles within circles, or what! :)

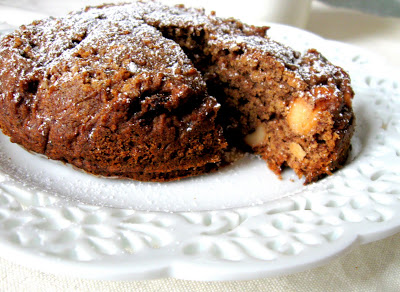
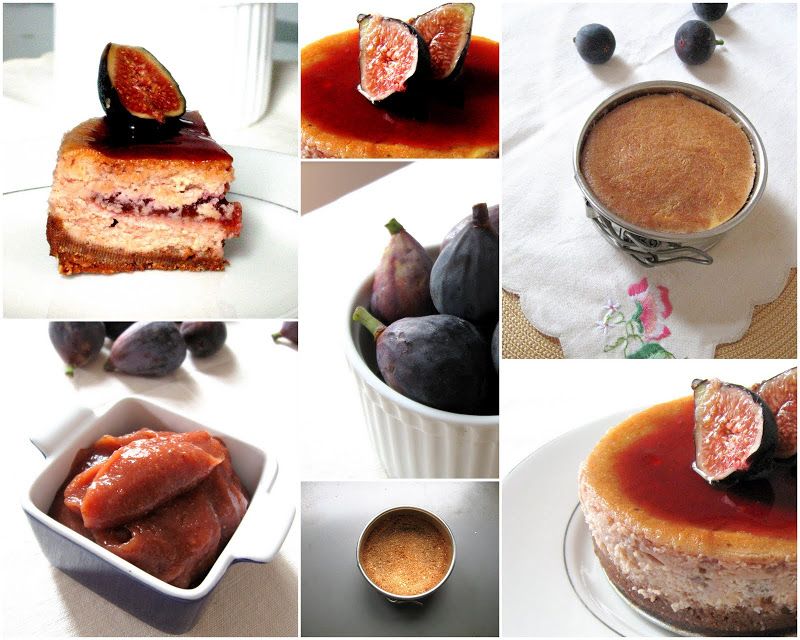
I pretty much followed the recipe. The only changes I made were using rum instead of marsala wine for the zabaglione, rum-ed coffee for soaking the savoiardi, orange zest for flavoring (no extracts at all) and chocolate whipped cream because I had some left over from making something else. The last is why my cream doesn't look yellow but a more muddled color. But, take my word, it tasted fantastic!

It was rather an elaborate process, with many different components that all come together nicely for a rich dessert. The savoiardis were ok for me; a bit too eggy eaten as is but gave a nice sponginess and body to the tiramisu. The mascarpone was creamy and rich. And yes, I panicked when I was making it because it didn't seem to be doing anything but after the refrigeration, it firmed up so nicely! I made extra, so happy!

Tiramisu single

You know the funny thing; for all my wanting to make tiramisu, I honestly don't remember tasting one or if I have (as Mr. FSK insists), it's actual taste. So, I don't know how this creation compares to the store. But, it was real good, stand alone!

Now, the litmus test is a couple of friends who just love Tiramisu. I saved a portion for them. My fingers are crossed and I'll keep you updated on the results! :) Meanwhile, enjoy my creation and visit the Daring Kitchen for everyone's gorgeous creations!!

The recipe below includes the tweeks I made for the individual portions.

Tiramisu
(Recipe source: Carminantonio's Tiramisu from The Washington Post, July 11 2007)
Makes 3-4 individual serves depending on size

For the zabaglione:
1 large egg yolks
1.5 T sugar
1/8 cup rum
1/2 tsp orange zest

For the vanilla pastry cream: (this makes twice the amount needed)
1/4 cup sugar
1 T all purpose flour
3/4 tsp finely grated orange zest
1 large egg yolk
3/4 cup whole milk

For the whipped cream:
1/2 cup chilled heavy cream (we used 25%)
1/8 cup powdered sugar
1/2 T unsweetened cocoa powder

To assemble the tiramisu:
1/2 cup brewed espresso, warmed
1 T rum extract
1/4 cup sugar
1/6 cup mascarpone cheese
20-25 savoiardi/ladyfinger biscuits (you may use less)
2 tablespoons unsweetened cocoa powder

To make the zabaglione:

Heat water in a double boiler. If you don’t have a double boiler, place a pot with about an inch of water in it on the stove. Place a heat-proof bowl in the pot making sure the bottom does not touch the water.

In a large mixing bowl (or stainless steel mixing bowl), mix together the egg yolks, sugar, rum and zest. Whisk together until the yolks are fully blended and the mixture looks smooth.

Transfer the mixture to the top of a double boiler or place your bowl over the pan/ pot with simmering water. Cook the egg mixture over low heat, stirring constantly, for about 8 minutes or until it resembles thick custard. It may bubble a bit as it reaches that consistency.

Let cool to room temperature and transfer the zabaglione to a bowl. Cover and refrigerate at least 4 hours or overnight, until thoroughly chilled.

To make the pastry cream:

Mix together the sugar, flour and zest in a medium heavy-bottomed saucepan. To this add the egg yolk and half the milk. Whisk until smooth. Now place the saucepan over low heat and cook, stirring constantly to prevent the mixture from curdling.

Add the remaining milk a little at a time, still stirring constantly. After about 12 minutes the mixture will be thick, free of lumps and beginning to bubble. (If you have a few lumps, don’t worry. You can push the cream through a fine-mesh strainer.)

Transfer the pastry cream to a bowl and cool to room temperature. Cover with plastic film and refrigerate at least 4 hours or overnight, until thoroughly chilled.

To make the whipped cream:

Combine the cream, cocoa and sugar in a mixing bowl. Set aside for 5 minutes. Beat with an electric hand mixer or immersion blender until the mixture holds stiff peaks. Set aside.

To assemble the tiramisu: (individual portions)

Place the pastry rings/molds on base. Mix together the warm espresso, rum extract and sugar in a shallow dish, whisking to mix well. Set aside to cool.

In a large bowl, beat the mascarpone cheese with a spoon to break down the lumps and make it smooth. This will make it easier to fold. Add the prepared and chilled zabaglione and pastry cream, blending until just combined. Gently fold in the whipped cream. Set this cream mixture aside.

Now to start assembling the tiramisu.

Working quickly, each ladyfinger in the sweetened espresso, about 1 second per side. They should be moist but not soggy. Immediately transfer each ladyfinger to the inside of the dessert ring, placing them side by side in a single row. You may break a lady finger into two, if necessary, to ensure the base of your dish is completely covered.

Spoon some of the cream mixture on top of the ladyfingers, then use a rubber spatula or spreading knife to cover the top evenly, all the way to the edges. Repeat to create one or more layers, alternating the ladyfingers and the cream mixture for each layer. Clean any spilled cream mixture; cover carefully with plastic wrap and refrigerate the tiramisu overnight.

To serve, carefully remove the plastic wrap. Run a sharp paring knife along the inner edges of the ring and ease it up. The tiramisu will stay on the base. Sprinkle the top with cocoa powder using a fine-mesh strainer or decorate as you please.


Mascarpone Cheese
(Source: Vera’s Recipe for Homemade Mascarpone Cheese)
This recipe makes twice the amount you need for the Tiramisu

1 cup whipping (36 %) pasteurized (not ultra-pasteurized), preferably organic cream
1/2 to 1 T fresh lemon juice

Bring 1 inch of water to a boil in a wide skillet. Reduce the heat to medium-low so the water is barely simmering. Pour the cream into a medium heat-resistant bowl, then place the bowl into the skillet. Heat the cream, stirring often, to 190 F. If you do not have a thermometer, wait until small bubbles keep trying to push up to the surface.

It will take about 15 minutes of delicate heating. Add the lemon juice and continue heating the mixture, stirring gently, until the cream curdles. Do not expect the same action as you see during ricotta cheese making. All that the whipping cream will do is become thicker, like a well-done crème anglaise. It will cover a back of your wooden spoon thickly. You will see just a few clear whey streaks when you stir.

Remove the bowl from the water and let cool for about 20 minutes. Meanwhile, line a sieve with four layers of dampened cheesecloth and set it over a bowl. Transfer the mixture into the lined sieve. Do not squeeze the cheese in the cheesecloth or press on its surface (be patient, it will firm up after refrigeration time).

Once cooled completely, cover with plastic wrap and refrigerate (in the sieve) overnight or up to 24 hours.


Savoiardi Biscuits/ Ladyfingers
(Source: Recipe from Cordon Bleu At Home)
This recipe makes approximately 24 big ladyfingers or 45 small (2 1/2" to 3" long) ladyfingers.

3 eggs, separated
6 tablespoons /75gms granulated sugar
3/4 cup/95gms cake flour, sifted (or 3/4 cup all purpose flour + 2 tbsp corn starch)
6 tablespoons /50gms confectioner's sugar,

Preheat your oven to 350 F (175 C) degrees, then lightly brush 2 baking sheets with oil or softened butter and line with parchment paper. Beat the egg whites using a hand held electric mixer until stiff peaks form. Gradually add granulate sugar and continue beating until the egg whites become stiff again, glossy and smooth.

In a small bowl, beat the egg yolks lightly with a fork and fold them into the meringue, using a wooden spoon. Sift the flour over this mixture and fold gently until just mixed. It is important to fold very gently and not overdo the folding. Otherwise the batter would deflate and lose volume resulting in ladyfingers which are flat and not spongy.

Fit a pastry bag with a plain tip (or just snip the end off; you could also use a Ziploc bag) and fill with the batter. Pipe the batter into 5" long and 3/4" wide strips leaving about 1" space in between the strips.

Sprinkle half the confectioner's sugar over the ladyfingers and wait for 5 minutes. The sugar will pearl or look wet and glisten. Now sprinkle the remaining sugar. This helps to give the ladyfingers their characteristic crispness. Hold the parchment paper in place with your thumb and lift one side of the baking sheet and gently tap it on the work surface to remove excess sprinkled sugar.

Bake the ladyfingers for 10 minutes, then rotate the sheets and bake for another 5 minutes or so until the puff up, turn lightly golden brown and are still soft. Allow them to cool slightly on the sheets for about 5 minutes and then remove the ladyfingers from the baking sheet with a metal spatula while still hot, and cool on a rack.

Store them in an airtight container till required. They should keep for 2 to 3 weeks.

Sunday Brunch: Baked Eggs with Vegetable & Ham Hash, Sweet Potato Scones with Blood Orange - Maple Sauce

Baked Eggs + Hash close up

We are the typical lazy, Sunday brunch couple; late Saturday nights spent in company of friends or just each other, waking up close to noon on Sundays, just in time for early lunch or as is common in these parts - Brunch.. The only difference between us and scores of other NY-ers is that we don't drink and we don't do the long brunch lines (unless ofcourse we plan to do just that with friends). So, our typical first meal of Sunday is not eggs benedict with a side of OJ and strong coffee; more like a leisurely chai with many many glucose biscuits and then regular lunch.

Last night, I had a sudden craving for a typical NY style brunch with the eggs, muffins et all. But, all my craving did not overpower my abhorrence of standing in line in the freezing cold and smiling about it! So, it was to be Brunch at home, cozily warm and leisurely lazy.. no need to wake up early to beat the rush at 11:30! YAY!

Sweet Potato Scones with blood orange maple sauce

My menu - Eggs with hash, breakfast scones and fruit. Rummaging around the net and in my pantry and fridge, I found inspiration, sweet potato, ham and half a head of cauliflower. Passing by Chocolate Shavings, I found this lovely recipe for baked eggs. From there, it was simple stretch of imagination to incorporate what I had on hand (Early morning shopping is a strict no-no!)..

Now, cauliflower ranks rather amongst my least favorite vegetables. Mr. FSK knows that. Yet, for some reason, whenever I send him out to the grocery store, he comes back with a head of it (:OO!!), leaving me with a frown on my face (so not good for my looks!) and having to come up with ideas to consume it before it gets wrapped in deathly fungal hallows.. sighh.. I do like cauliflower with cheese (lot of it), so I figured, it would work well in a hash where it's flavors are not dominant.. So, that's one down...

Baked eggs over hash

There isn't a good wholesome hash without potato. So that went in too. Then, the ham just fit in right along! To go with that, I wanted a cheese that would melt, become gooey and perfectly satisfying. I had provolone and fresh mozzarella on hand. I chose the latter because.. well, because I just felt like it! :-)

There! I had my first item - Potato and Cauliflower Hash with Mozzarella topped with Baked Eggs.

Sweet Potato Scones

My perfect brunch has to have a little sweet element to it. Usually I order french toast and nibble on hub's eggs. Today, I decided to go with scones. After my first success with the British breakfast item, Orange Yogurt Scones, I have just been hooked to them in general.

Sweet Potato is the chosen ingredient for this month's Beet 'n Squash You, hosted by Melody and Leela. Drawing inspiration from pumpkin spice scones, I chose to accompany my egg dish with Sweet Potato and Cinnamon Scones topped with a Blood Orange & Maple Sauce.

I had to plan the brunch a bit and manage time and all that. But, hey, it was well worth the effort. Sitting down with a full plate of baked eggs and hash, fresh warm scones and sauce and a some refreshing fruit was just the perfect way to start the Sunday! :))

Have a great week everyone! :)

Brunch Plate


Baked Eggs with Potato, Cauliflower and Mozarella Hash
(serves 2)

2 eggs
1/2 medium red onion, julienned
1 clove garlic, minced
1/8 lb cured ham (any kind you like)
1 small russet potato, boiled
1/4 cup cauliflower, flowerlets
3 T fresh parsley, finely chopped
1 tsp italian seasoning
1 tsp paprika
3 T light cream
2 mozzarella rounds, 1/4 inch thickness, width to fit your ramekins
salt, pepper, olive oil as needed

Garnish:
sprig of parsley
2-3 cherry tomatoes, sliced thin

Toss the cauliflower in a little oil, salt and pepper and roast in a 350F oven for 15 minutes until crisp and cooked. Meanwhile, in a skillet and lightly saute the ham in a little oil. Add the onion and garlic and saute till soft. Season with salt, pepper and other seasoning. Add diced, cooked potato and toss for a couple of minutes. Remove from heat and transfer to a mixing bowl. Toss in the roasted cauliflower and set aside to cool until ready to assemble.

Just before assembling, add the cream and parsley to the hash mixture and stir to incorporate. Brush the inside of two 10 oz ramekins with butter. Divide half of the hash mixture equally between the two ramekins. Layer the mozzarella over this. Top with the remaining hash mixture.

Break the eggs one at a time in a small bowl and gently transfer to the top of the ramekins. Sprinkle a pinch of salt to season the egg. Cover with foil (to ensure that the yolk doesn't cook faster than the whites). Bake at 350F for 20-25 minutes until the egg is set and whites are cooked.

Garnish ramekins with the tomato slices, parsley and tiny sprinkle of paprika. Serve immediately.


Sweet Potato Scones with Blood Orange and Maple Sauce

1 cup cake flour
2/3 T baking powder
1/4 tsp baking soda
1/4 tsp salt
1 tsp ground cinnamon
3 T brown sugar
3-1/2 T very cold butter, diced
3 T heavy cream
1/4 cup sweet potato puree
butter and sugar for brushing and sprinkling

In a medium bowl, sift together the flour, baking powder, soda, salt and cinnamon. Using a pastry cutter or two knifes, cut in the cold butter so the mixture resembles a coarse meal. In a small bowl whisk together cream, potato puree and brown sugar.

Add the wet mixture to the dry and bring together to a form a crumbly dough. Scrape the dough to a lightly floured surface and bring together to form a dough ball. Pat to form a circle of about 1 inch thickness. Wrap in plastic and refrigerate for atleast 30 minutes.

When ready to bake, remove dough and thaw for 5 minutes. Then roll it out on a floured surface to 1/2 inch thickness. Using a cookie cutter of your choice, cut out scone shapes. Place on parchment paper. Brush the tops with butter and sprinkle sugar.

Bake at 400F for 15-20 minutes, until the tops are golden and a toothpick comes out clean when inserted.

Cool for a few minutes on the rack. Serve warm topped with Orange-Maple sauce


Blood Orange and Maple sauce

1 blood orange, juiced
1 T maple syrup
1 T sugar
1/8 tsp corn starch

Over medium heat, bring the above ingredients to a boil. Whisk in the corn starch. Lower heat and let simmer for 2 minutes. Remove from heat and cool to warm. Pour over scones and serve.

I Heart Thee - Couple's Velvet Cake {Valentine's Day Post}

Couple's Velvet Cake

YAY! This cake got voted to FoodBuzz Top 9 on 14 Feb 2010. Thanks for all the LOVE!!


With Valentine's day just a couple of days away, the blogosphere is filled with yummy things Red and lovely. It isn't surprising that the spirit carried over to the Twitter World. What with mouth watering posts popping up all over from tweet friends, it was only inevitable that one starts thinking up stuff for the cause, even though Mr. FSK and I do not observe the "day" (that is only 'coz our anniversary is a few days earlier! :)).

So when Aparna asked me if I wanted to bake a red velvet cake in time for V-day with fellow Velveteers, Pam and Alessio, I jumped on it. Truth be told, I have not found the cake very appealing primarily because of the amount of artificial coloring that goes into it. Somehow, the idea of making it red by adding a poundful of color just didn't seem right. But, I remembered the history of the cake and the color from a Throwdown episode I had seen a while back and I wanted to try my hand at some of this practical chemistry (it was one of favorite subjects in school.. Loved organic chemistry, not so much inorganic).

The original cake made eons ago, relied on the reaction between the buttermilk and vinegar in combination with the chocolate to produce the reddish tinge that gave the cake the name. I wanted to have some fun with food chemistry and the rule to NOT use artificial coloring for baking with these awesome bloggers was just the right motivation.

So, I did research. I found out that to have any chance of the natural reaction, I needed to use regular cocoa and not the Dutch processed (which is usually coveted) because of the latter's alkaline nature. Fortunately, that was the cocoa I had at home. Then I learnt that the cultured buttermilk that you get in the stores are pretty tame pH wise to cause a pop. So, I decided to make my own buttermilk...

Velvet cake sliced
Clearly I have quite a ways to go on piping frosting prettily!


I remember my mom used to skim the cream off the boiled milk everyday and store it in a jar till there was enough to make butter. Then she would churn it by hand to separate the butter and buttermilk. A major portion of that butter would then be converted to ghee. It all seemed a long, tedious process to me and I was a bit deflated, at first, when I realised I had to make buttermilk.

Glory to Google, it wasn't to be so bad! This day and age, all you do is add heavy cream to the blender and whip at high speed, till the butter separates out. It was such a cool feeling!! The nice part is you can use the butter and the buttermilk you make in this cake. Now, nothing can beat all that homemade LOVE!!! :))

So, I was set and ready to bake. I whisked the buttermilk and vinegar, but, nothing seemed to happen, even after upping the amount of vinegar. I proceeded anyway and made the batter which was not quite the chocolate cake color but a duller brown, with a very very slight slant to red (or perhaps that was just me hoping!). Anyway, I wanted something red in it, so I added a couple of tablespoons of mashed thawed raspberries. They didn't do much to the overall color, just a few flecks of red here and there but I think they added to the moisture of the cake.

Now for the decoration. Typical frosting for red velvet cake is cream cheese based. But, I am not a big fan of it because cream cheese has a pronounced tang which needs a ton of sugar to make sweet. So I decided to go with a whipped cream frosting which is way lighter as well and lends better to delicate flavors.


Slice and sliced cake

Since it was a chocolate cake of sorts, I made the inside filling of chocolate & rum whipped cream and the outer frosting of rose whipped cream; rose being the symbolism for the day and all. Besides, I like rose flavor (love rose milk!). And, since I am mischievious by nature, I decided to go over the top and decorate with mini-hearts made of strawberry gelee. LOL..

Alhtough the cake did not come out red, it sure was velvety. The texture was serious melt-in-your-mouth. I think the buttermilk adds to the nice texture (Check out Alessio's post for an actual lesson in food chemistry.. fantastic!). There was just a hint of chocolate, which I didn't mind at all. And I loved the cream frosting; it was light, airy and mild (oh and rum soaked..haha). This is now my favorite cake recipe.

All in all, I thoroughly enjoyed working with the cake and giving in to some whimsical fancies, even if I failed at the chemistry (hey! it's all about the learning, not the grades, right?!).

Check out what the other Velveteers have created, all naturally colored -

Aparna - Eggless Red Velvet Cake
Pam - Red Velvet Cake (with beetroot juice)
Alessio - Raspberries Red Velvet Cake


Velvet Cake For Two

** Since it's for a couple, I sized it accordingly, you can triple portions for a 9 inch cake.

I was generous with the alcohol given the occasion. For a kid-friendly version, skip the alcohol**

Cake:
(Recipe adapted from Epicurious)

3/4 cup sifted cake flour (or 3/4 minus 2 T cup AP flour plus 2 T corn starch)
1 T unsweetened cocoa powder (natural, not Dutch processed)
1/3 tsp baking powder
1/3 tsp baking soda
pinch of salt
1/3 cup buttermilk
1 tsp distilled white vinegar
1/2 tsp almond extract
1/2 cup sugar
3 T unsalted butter, room temperature
1 egg, room temperature
2 T mashed, thawed raspberries

5 T rum
5 T water
1 T sugar

Preheat oven to 350°F. Butter and flour a 5inch by 3 inch cake pan. Sift together the flour, cocoa, baking powder, baking soda, and salt. Whisk buttermilk, vinegar, and extract in a small bowl. Using an electric mixer, beat sugar and butter in large bowl until well blended. Add the egg, beating until well blended. Add in dry ingredients alternating with the buttermilk mixture starting and ending with the dry. Beat in the mashed raspberries.

Pour batter into the pan (there may be a bit more than can fit. Don't over stuff). Bake for 30-35 minutes or until tester comes out clean. Cool in pans on racks 10 minutes. Turn cakes out onto racks and cool completely. Meanwhile, mix together the water, rum and sugar and set to cool.

Using a cake knife cut the cake into two horizontally (you can also bake in two pans. I only have one). Pour the rum mixture evenly on both halves and let it soak in. Generously spread the chocolate cream onto the base layer making it slightly thicker in the center as it will spread when the second layer is placed. Gently place the top layer and coat with a thick layer of the rose cream frosting. Decorate with strawberry hearts.

Frosting:

Chocolate and Rum Cream
1/2 cup heavy whipping cream
2 tsp unsweetened cocoa
1/3 cup + 2 T powdered sugar
2 T rum

Add the cocoa and rum to the cream and set aside for 5 minutes in the refrigerator. Start whipping at low speed and increase to the highest speed on your mixer. When it has doubled in volume, add the sugar slowly. Continue whipping until soft peaks form. Cool for atleast 15 minutes before spreading on cake.

Rose Cream
3/4 cup heavy cream
1/2 cup powdered sugar
1 T rose water

Use same procedure as above

Strawberry gelee hearts

1/4 cup strawberry puree
1/4 cup water
1-1/4 tsp gelatin

Bring the puree and water to a boil. Off the heat, add gelatin, whisk to incorporate completely. Cool to room temperature and then cool in fridge till it is just starting to set is fluid enough to pipe.

Pour into a ziplock bag. Make a tiny cut and pipe hearts onto a silpat sheet. Cool overnight to set. Peel off the hearts and place on frosting.


Roasted Butternut Squash and Apple Mini Cakes

YAY!! These cakes were voted on to FoodBuzz Top 9 on 13 Jan 2009!!!! :))))

butternut squash & apple cake

Good Morning everyone! Ok, I know it's afternoon even in this part of the world but hey, it's still morning on the West Coast! So, I am covered. Anyway, I consider morning as the few hours that follow my waking up, irrespective of when that falls in the traditional day cycle. hehe..

Ah well, I blame the cold for this out-of-the-box thinking ;-). NYC is at its coldest, of the last five years I have been here, and it really makes it more appealing to stay tucked in warm and cozy. Then, once up, it's time to browse my favorite food blogs and drool over the photos, learn of a new recipe that needs to be tried out very soonly and then perhaps actually getting around making it. Besides, I have had a lot of catching up to do on blog reading since my vacation days.


So, when I came across Meeta's call to make something of Winter Vegetables and Fruit for her Monthly Mingle, I was super thrilled. You see, I had made mini cakes with squash and apples sometime back and had not found the opportunity to post about them. And here was the perfect time to talk about them. This month's mingle is being hosted by Sudeshna of Cook Like A Bong.

apple & squash cake

And what a close call?! Just a day before the doors closed! I can just hear them slowly closing and me just about wiggling through like in the movies. ok, yes yes, hyper active imagination and all, I know .. :)

Ok, so without further ado, let me introduce my Roasted Butternut Squash and Apple Mini Cakes. Why mini-cakes? Well, I went to the baking supply store and saw these cute 3 inch shallow paper molds and just had to use them! :) And, the squash because I like the sweetness that roasting brings out of it and thought it would add great flavor and moisture to the cake itself.

butternut squash and apple cake


Roasted Butternut Squash and Apple Mini Cakes

(makes about five 3-inch cakes)

1 small butter nut squash, peeled and diced, about 1-1/2 cups
1 golden delicious apple, peeled and diced + a few thinly sliced to arrange on top
1 cup all purpose flour
6 T melted butter
2 eggs
1 T cocoa powder
1/2 cup brown sugar + 2 T for roasting the squash
4 T milk
1 tsp baking soda

Preheat oven to 350 F degrees. Toss the diced squash in 2 tablespoons of brown sugar and roast for 20-30 minutes until caramelised. Remove the squash and keep the oven on.

Sift the dry ingredients (flour, cocoa, baking soda) together. Add the butter, milk, sugar and eggs and whip to a smooth batter. Fold in the roasted squash and apples into the batter.

Pour into buttered molds and bake for 30 minutes. Let cool to room temperature, dust with powdered sugar and enjoy!

Trout en Croute for Daring Cooks

trout en croute

The last week of November was quite hectic. I was travelling soon after and there were so many bakes to finish before I could take leave of my oven. As it also happened to be the Thanksgiving week, the time pressure was more. Amidst the dinners and entertaining, I had to find time to complete the month's challenge for Daring Cooks!! Fortunately, this month's challenge was easy enough to put together and completely stress-free, so, I just about managed it! :)

The 2009 Daring Cooks challenge was hosted by Simone of Junglefrog Cooking. Simone chose Salmon en Croute (or alternative recipes for Beef Wellington or Vegetable en Croute) from Good Food Online.

You will notice that my title says trout and not salmon. Well, I just took some creative liberties with the protein element. You see, when I went to the fish stall, the trout looked way more appealing and fresher than the salmon. Besides, salmon to me is best eaten raw in sushi form. Butter poached salmon from steak houses have just put me off the cooked fish. Also, trout is a softer fish than the salmon and I think that worked really nicely with the sauce in this dish.

Picture 001-1

Anyway, happy as a beaver, I set off on making lunch. I had the pastry dough ready. I used store bought dough (I know that is blasphemous to all you conservatives out there but when is time is short... :)). I made the cream sauce with cream cheese, arugula, basil and spinach flavored lightly with lemon zest.

Packed and trimmed, with those neat little bows (cute, aren't they?!), the fish in pastry looked really pretty and ready for the oven. Thirty minutes later, I took it out, in heavy anticipation. Simone's sample photos of the challenge looked so beautiful, so true to the adage of eating with your eyes first. Unfortunately, I was in for a disappointment. My cooked pastry looked nothing like Simone's!! For some reason, it was neither glamorous looking nor young and taut as hers.

like

Nevertheless, I put my disappointment at the back of my mind and set about photographing, so we could get on with the eating. My heart was heavy but it lightened quite a bit once I took a bite of the dish! It was awesome! Light and flaky, the trout had absorbed the flavors, from the sauce, well. I had been generous with packing the sauce in the pastry, so we did not even need more on the side.

All the while, there was the nagging question in my subconscious mind about the lackadaisical appearance of the pastry. It was only later in the evening that the answer came to me. You see, as I was reading the recipe for the short crust pastry, it somehow stuck in my mind that it was like puff pastry. So, I had wrapped the fish in puff pastry. Only later, as I was mulling over the recipe, did it strike me that it was like tart crust, not puff pastry!! So there, mystery solved. Next time, I will be sure to use the right pastry. LOL!

trout en croute close up

Interestingly, the dish reminded me very much of a Parsi dish that my MIL makes, Chutney Fish. It is of similar concept; the chutney is made with coriander, green chillies and a hint of tamarind, the fish (usually pomfret) is generously coated with it and then wrapped in a banana leaf and steamed. It's incredibly delicious!

Btw, if you would like a complete en croute meal, check out my Curried Egg Pastry Cups for appetizer and Brie en Croute for dessert.


Salmon en Croute
(serves 4)

5.2 ounces/150 gr Mascarpone or creamcheese
0.6 cup/4.2 ounces/120 gr Watercress, rocket (arugula) and spinach
17.6 ounces, 500 gr Shortcrust pastry
17.6 ounce/500 gr Salmon/trout fillet (skinless)
1 egg

Heat the oven to 200°C/390 F. Put the mascarpone or cream cheese in a food processor with the watercress, spinach and rocket and whizz the lot until you have a creamy green puree. Season well.

Roll the pastry out so you can wrap the salmon in it completely (approx. 2-3 mm thick) and lay it on a buttered or oiled baking sheet (it will hang over the edges). Put the salmon in the middle. If it has a thinner tail end, tuck it under. Spoon half of the watercress mixture onto the salmon.

Now fold the pastry over into a neat parcel (the join will be at the top, so trim the edge neatly), making sure you don’t have any thick lumps of pastry as these won’t cook through properly. Trim off any excess as you need to. Make 3 neat cuts in the pastry to allow steam to escape and make some decorations with the off-cuts to disguise the join if you like. Brush with the egg glaze.

Bake for 30 minutes or until the pastry is crisp and browned. To test wether the salmon is cooked, push a sharp knife through one of the cuts into the flesh, wait for 3 seconds then test it against the inside of your wrist; if it is hot, the salmon is cooked. Serve with the rest of the watercress puree as a sauce.

Shortcrust pastry

While this is not mandatory to do, I highly recommend making your own shortcrust pastry as it is very simple to do! As mentioned in the notes; please make sure to not add too much water as that is the key to having a successful shortcrust pastry.


450 gr (15.8 ounces or 3.2 cups ) of plain all purpose flour
200 gr ( 7 ounce) cold butter
pinch of salt

Sift the flour into a large bowl, add the butter and rub in with your fingertips until the mixture resembles fine breadcrumbs. If you have a food processor you can use that as shown in the above video.

Stir in the salt, then add 2-3 tbsp of water and mix to a firm dough. Knead the dough briefly and gently on a floured surface. Wrap in cling film and chill while preparing the filling.

For best results make sure the butter is very cold.

Leek and Prosciutto Tart with Warm Apple Cider for Fall Brunch


Yay! I made it! You wondering what? Well, I have been planning this brunch for the past three weekends and something or other just kept pushing it on to the back burner. This weekend, I finally decided to tell my Google calender whoz boss! I put my foot down, cleaned out all the scribbles in my schedule and got down to the baking....

Now, you wonder, why all this fuss to get this done. After all, brunch is my favorite meal of the weekend especially because it has such a leisurely note to it! Well... the thing is, Meeta of What's for Lunch Honey is hosting a Brunch today and I don't want to be late for it. It isn't polite, is it?; to RSVP yes and then show up after the party! Very very not acceptable in my hostessing and guesting book....


Anyway, I do get like that when I have to host or cook something by a deadline. I frazzle about and worry till the table is all set and ready. Even then, I can think of just a few more garnishes and little stuff that would make it better and more so... The never ending quest for perfection, ain't it?! :)

Anyway, I have made the typical brunches / breakfasts at home; pancakes and bacon, over easy eggs with Mornay Sauce, Eggs on Toast with Fruit Sauce and more. I love brunching at home. It is my favorite meal, as I said, but I do not particularly relish standing in a line for hours to get it (as inevitably happens at any decent brunch place in the city on a weekend.. New Yorkers' discretionary patience just amazes me sometimes :)))..


This time, I wanted to make something different but still brunch-y. I wanted to play with eggs, cheese, ham and fresh fruit, all typical brunch items for me.

So I thought, why not bake? And, ofcourse, quiche immediately popped into my head. That's a bit more lunch-like for me and quite heavy. So I went with a lighter tart and to bring in that bacon/ham angle, I chose the delicate and flavorful prosciutto paired with mild leeks and goat cheese. And the fruit; well, it's Fall and you guessed it.. Apples!! I made fresh warm spiced apple cider with a hint of citrus...

So, that is the lovely brunch I plan to take to Meeta's - Leek & Prosciutto Tart with Arugula Salad and Warm Apple Cider....


Let's toast!


Leek & Prosciutto Tart
(makes 2 six inch individual tarts or 1 9inch tart)

1 butter crust (Recipe here)
4 oz goat cheese, room temperature
2 T sour cream
2 eggs, room temperature
1 small leeks, sliced fine
1/4 lb prosciutto
1 tsp Worcestershire sauce
1 tsp pimento sauce or other hot sauce
salt and pepper to taste

Chop the prosciutto into squares, reserving a slice or two for garnish. Cream goat cheese and sour cream together to get a smooth, creamy mixture (this is why, it is important to bring the cheese to room temperature). Add the eggs one at the time and whisk to incorporate fully. Add the rest of the ingredients and mix well.

If you are making individual tarts, cut the tart crust accordingly. Blind bake for 10-12 minutes at 400 degrees. Cool the tarts a little, so the eggs don't scramble. Fill and bake at 350 degrees for 25 minutes until cooked and the center is set.

Rest for a few minutes till cool enough to handle. Serve the tarts, garnished with the reserved prosciutto and a few leek rings..

For the salad, I dressed the arugula simply with balsamic vinegar, salt and pepper and topped with toasted pignolis.

Fresh Spiced Apple Cider

4 Macintosh apples, cored, peeled, diced
1 tsp lemon juice
2 slices of lemon
1 tsp sugar
2 cups water
1 stick cinnamon
5 cloves
1 star anise
2 cloves cardamom

Puree the apples with the lemon juice to as fine a consistency as you can. Add a little water if needed to get the blades working. In a sauce pan, add the apple puree with the rest of the ingredients and bring to a boil. Simmer for 10 minutes with lid on. Cool for a few minutes and let the flavors steep. To serve, strain the cider through a fine sieve. Garnish with a slice of lemon or some mint.

Celebrating Fall with Apple Angel Cake


There is usually a story inspiring my posts? Some have a good plot, with attention arresting twists and turns while quite a few eh not much to write home about. Still, there is the story.

I really don't have any for this one. It is just Fall and that means apples and pumpkins and all things warm and cozy; Freshly baked just fits the theme and has an all-new allure. I mean, you just can't let Fall and the fresh nip in the air go by without saluting it with a warm baked apple, can you?! Nooo...


I still had apples from the nice big bucket we picked up at the farm. So, I was thinking, pie, but then, it just seemed too cliched. I know, it is a cliche only coz it works... everytime! But, still, I am thrill seeker and I wanted a new rush. So I thought, cake. Yes I know, nothing imaginative in that but with the twist of making it light and airy with a nice caramalised top of apples, the idea really appealed.

And, so it came to be; Angel Cake with Apples,Nuts and a hint of spice.


Traditionally, angel cakes are made in tube pans, which, I don't own. I made mine in a nice tall souffle dish over a bed of marinated apples and then just turned it over.

I really love the cake. It is fluffy and angel-like as intended and has a deep seductive spice note to it and ofcourse the apples... they are indeed the star and they shine .. shine on like a crazy diamond... isn't Fall just the mood for some Floyd?!

And, now if you'll excuse me, am off for another slice.. It is tea time! :)


Apple Angel Cake

**
I used a souffle dish to bake. If you have a tube pan, go for the traditional look.

If the apples don't look caramelised enough when you turn the cake upside down, stick it in the oven for 5 minutes at the highest temperature on the top rack.

**
4 macintosh apples
1-2/3 scant cups of flour
1 cup sugar
1 T honey
3 egg yolks
2 egg whites
2-1/2 scant tsp of baking powder
1/2 tsp salt
2/3 cup oil
6 T apple sauce
1/2 tsp + 1/2 tsp cinnamon
juice of half a lemon
1/2 cup of toasted almonds, chopped


Peel, core and dice the apples. Toss them in a mixture of honey, 1/2 tsp of cinnamon and a teaspoon of lemon juice. Set aside and let marinate until ready to bake.

Sift together the dry cake ingredients except sugar. In another bowl, cream the yolks and sugar. Add in the oil and apple sauce and whisk to incorporate well. Add the dry flour in three parts, whisking the batter each time to mix completely.

In a clean bowl, whips the whites till they form stiff peaks. Gently fold in 1 tablespoon of batter into the whipped whites to loosem them. Add whites in two parts to the batter, gently folding just enough to mix and until there are no streaks of the whites visible in the batter.

Quickly fold in a third of the apples and the nuts into the batter in just 3 turns. Do not over mix; the cake will lose the fluffiness.

To assemble, place the remaining apples in one layer at the bottom of the baking pan. Pour the batter over the apple layer. Bake at 350 degrees for an hour and a half or until a toothpick inserted in the middle comes out clean.


Crab Curry; Updated to the new age


There is this comfort in the 'old' and the 'passed down'. Ok, not clothes and stuff but recipes, heirlooms, old wood furniture.. stuff like that.
There is that sense of treasure and also of family; the feeling of love and yes, the spirit of all those people who passed it along lovingly to you. It's like being wrapped up in a warm blanket, feeling all fuzzy and happy.

I did not explicitly ask my mother for her recipes. But, the food I make is significantly inspired by my mom's cooking, which, in turn drew hugely from my grand mom's and so on. So, albeit indirect, the flavors of my kitchen, today, have been passed down through the generations and it just makes such a wonderful bond; A way to remember those who have left us, except in memories, and feel close to those who live too far away to pop in for dinner.

Along the way, as it gets passed down, each recipe is so subtly modified by that generation's likes and tastes as each home chef adds her own personality to that treasured family recipe. And, surely, she is eager to as well! :)


The crab curry that I make is no exception. I simply love crabs and fresh ones are always the best. And the hub; he loves the crabs (not so much the work involved) but he loves the curry even more! :-) Every time I go to Chinatown (get all my seafood from there), I get some to make this curry that brings back memories of home, the smell of the salty air and sea and the lazy, indulgent Sunday afternoons.

The first time I saw live crabs sitting in a bucket in the store, I swooned.... under the waves of nostalgia. I had to make that curry. And, I did. It was too late to call my mom in India, so I just made the curry from memories and what my palate said would taste like mom's (Read that post here).

Since then, I have made the curry many times! And, over the course of time, modified it and added my own personality; subtly but makes it distinctly mine. The next generation will now get the same vintage flavors but with the twist of the new millennium! :)

Have a great week ahead!

Before you go, I just wanted to tell you that I am thrilled that Foodie Views is featuring my crab curry!!!! Please do check out their delicious photos and also while, you are there, a vote for me would be really nice! :D


To check out my other photos of Foodie Views, link here...

Crab Curry

6 medium crabs, cleaned
2 medium onions
3 cloves of garlic
nice chunk of ginger
3-4 ripe tomatoes
1/2 cup coconut milk
1/2 cup fresh grated coconuts
2 cups water
2 bay leaves, dry
2 tsp split gram, urad dal
1/2 tsp fennel seeds
2 tsp whole mustard seeds
1 tsp cumin seeds
1/2 tsp tumeric powder
6-7 fresh curry leaves
1 lime sized ball of fresh tamarind, or 5 T tamarind paste

For the dry roast:
6 dry red kashmiri chilies (these are of medium heat and give a wonderful red color)
2 dry hot chillies
1 T coriander seeds
1 T cumin seeds
7 cloves
1 stick of cinnamon
2 star anise
4 whole peppercorns

salt and oil as needed

Toast all the dry roast spices till they release their aromas; this intensifies their flavors. Remove to a bowl and cool. In a heavy bottomed pan, saute the onions, garlic, ginger and tomatoes in a little oil until soft and almost cooked through. Cool and process along with the roasted spices to a fine paste. Do not add water, there should enough moisture from the tomatoes.

In the same pan, add more oil and toast the split gram, mustard and cumin seeds till the mustard starts popping. Add the fennel seeds, curry leaves and bay leaves. Roast for a minute and then add the onion mixture. Cook until the oil seperates from the mixtures and there is no raw smell. Add the tumeric and mix well.

Note: Do not let the fennel burn or toast for too long. They can render a very bitter taste!

Meanwhile, if you are using fresh tamarind, soak in half cup of warm water and squueze out all the juice. Stir in the fresh grated coconut, coconut milk and water and bring to a rolling boil. Reduce heat and simmer for 20-30 minutes. Stir in the tamarind juice. Cook for 10 minutes. Add the crabs (body, legs and pincers). Cover and cook for another 20 minutes.

Let the curry sit for atleast a few hours (preferrably overnight) before serving. The crabs absorb the flavor from the curry and the curry itself will taste distinctly of crab; of the sea with a hint of the sweet crab meat.

Roasted Pumpkin Barley Risotto for Halloween

Pumpkin Risotto

Last weekend we went on a fall hike in upstate New York. It was a gorgeous, sunny Fall day and the leaves were almost glowing and the state park was overflowing with people wanting to perhaps become a part of that beauty, just like the two of us. I promise I'll post on that very very soon.. but for now we have a pumpkin story.

So, on the way, we stopped at a farm and picked up some yummy apples and a gorgeously bright orange pumpkin; a nice, cute sweet one. I have been waiting and waiting the whole month to make things pumpkin-y! I have all these ideas in my head for recipes. Anyway, I was really thrilled to find this fab looking pumpkin and decided to start off with risotto for Halloween.


I think of risotto as a luxury not only because it is tricky to make and can go wrong so easily but also 'coz it takes a lot of patience and constant attention. As comforting as it can be, I consider it a special occasion dish and for this haunted day, I thought I would take a wee bit more time to ward off the ghosts.

Risotto in

By the way, here is a bit of trivia. Pumpkins are used to ward off bad omens and spirits in India too! Any new endeavor; house, car, business, is kicked off by breaking a pumpkin (white ones there) for good luck. We also hang a pumpkin, with a big moustached face painted on it, over the building to ward off bad things...

Ok! back to my pumpkin dish. Risotto, as you know, is usually made with arborio rice, a short grain and very starchy strain of rice. But, I didn't use it. I made risotto with barley. Yep! I discovered barley in a soup sometime back and fallen in love with it ever since. It has the same creaminess when cooked slowly but it adds a wonderful earthy flavor to the dish.

Serving 1

So that's my short story. Had a wonderful lunch of it and now am off to a scary party and some more pumpkins (carving this time) ... :)) Wish you all a cheerfully scary Halloween and fun times trick or treating! :)

By the way, Renee over at Flamingo Musings has been hosting an awesome Halloween food event through this week. A bunch of foodies and food bloggies got together to make fun Halloween themed items. Check out what everyone made for the GreatHallowTweet at her site.


Roasted Pumpkin Barley Risotto

1 cup barley
4 cups of chicken stock (sub: vegetable stock)
1 cup pumpkin puree
1 small onion, diced finely
2 cloves to garlic, minced
big chunk of ginger. minced
1/2 tsp pink peppercorns
1/2 tsp dried thyme
1 tsp oregano
2 T fresh mint
1 tsp Worcestershire sauce
2 T butter
2 tsp cumin powder
2 T sour cream
salt and pepper to taste

Cut the pumpkin, clean out the innards and place cut face down in a baking dish with a 1/4 inch of water. Bake in a 400 degree oven for 45 minutes until the insides are soft and cooked. Scoop out the cooked flesh and puree with the tiniest bit of milk to make a smooth puree.

Saute the onions and garlic in butter until translucent. Add in the barley and toast for a couple of minutes. Season with salt, pepper, cumin, thyme and oregano. Add two cups of stock and cook until the liquid is almost absorbed. Stir in the pumpkin puree.

Add the rest of the stock in half cup measures and stirring until it is fully absorbed. Slowly the barley will become creamy as the starch releases. When you are done with all the stock, remove from heat and stir in the sour cream.

Serve immediately garnished with mint leaves and a drop of pumkiny-sour cream.

Tea with Mom - Dates & Nuts Spice Cake


I was thinking about what to make for High Tea, the October Monthly Mingle event hosted by Meeta of What's for Lunch Honey and Aparna of My Diverse Kitchen. Then I read this post by one of my favorite bloggers Deeba, who aside from being a fabulous baker is a full time mom with two adolescent kids.


The post made me laugh and also brought back memories of my own teenage years. Honestly, and I am sure my mom will concur, they were anything but turbulent but I did have my rebellious moments! My chosen mode of attack was the hunger strike. Frankly, my stomach was the only instrument in my control, but, inadvertently (scout's honor!), I think I chose THE most effective weapon I could have. I don't think my mother would have succumbed as much to tirades and tantrums as my stubborn refusal of nutrition.

Perhaps, if I had made a rational argument for my cause, I could have avoided much heart burn (mine from a growling stomach and hers from my strike), but, that somehow never seemed an option at all. On the flip side how rational an argument can you make when you are stuck between being a child and wanting to be a grown-up?! :).

Anyway, despite all those teething pains, I think my mom is proud of who I am now and what I became and all that would not have been possible without her support and her discipline :). So,I thought it would be fitting to dedicate this post to my mother and every other mom out there with a teenage child going through the transition into maturity.

My mom is not very fond of sweets but I am. And, in the fashion of true compromise, I decided to make something sweet but not too sweet. For as long as I remember, mom would buy Lion dates packet for me (because I was low on hemoglobin). So, I made a date cake with lots of nuts and raisins and a hint of spice. It's best eaten warm with a cup of flavorful tea and a lot of gossip and catching up! :)

Here is to my mom and every other in the world. Because, no one will ever love us like our mothers!! :))

Dates & Nuts Spice Cake

3/4 cup all purpose flour
3-1/2 T butter
3/4 cup date paste or chopped pitted dates
3 T roasted chopped cashew nuts
handful of raisins
1 tsp five spice
1/4 tsp baking soda
4 T brown sugar (if you like it sweeter, you can add a couple more)
1 egg yolk
1/4 cup + 1 T water

Pre-heat the oven to 350 degrees.

Sift the flour, spice, baking soda together. Toss in the chopped nuts and set aside. In a small pan, combine water, butter, sugar and date paste. Over low heat, cook the mixture until the butter has melted, sugar dissolved and the mixture is smooth. Fold in the raisins. Remove from and cool for 10 minutes.

Add the date mixture and the yolk to the flour mixture and combine well. Pour into a greased 4 inch spring form pan and bake for 30 - 35 minutes until cake is springy to touch.

Let the cool for 10 minutes in the pan and then transfer to a rack. Sprinkle powdered sugar over the top and serve warm with butter.

POM-tastic Koresht - e -Fesenjan!

Recently, I was sent a case of POM Wonderful juice by the company to taste and test recipes. As soon as I was told I was getting the product, I started dreaming up things to make with it. And, the first thing that popped into my head was Fesenjan, the rich Iranian special occasion dish made with pomegranate molasses and walnuts.

There used to be a lovely Iranian restaurant in Bangalore, named Sufi (now closed) that served Fesenjan on special orders. You had to call in a day ahead and let them know if you wanted to order it. No, no, it does not take that long to make but the flavors in the dish develop and mature the longer it sits and overnight is the minimum recommended. All these elaborate arrangements coupled with the fact that it is a dish reserved for occasions, in Iran, just drew the mystic aura around it and I wanted to recreate that at home. :)

Now, I love pomegranates. I remember my mother lovingly peeling the rind and cartilage off the fruit for her dearest daughter (that's Me..). Interestingly, this is one of those things that is also very good for you (what a lucky coincidence!). It is full of antioxidants and is beneficial to cardio-vascular health. You can read more about the health benefits of POM Wonderful juice here.

So, back to the Fesenjan. It really is a very simple dish getting it's flavors primarily from the ground walnuts and pomegranate reduction. The toasted walnuts are slightly bitter and the pomegranate is sweet and tangy at the same time. As the pomegranate juice reduces, the sweetness gets enhanced. The resulting gravy is rich, deep and yet subtle in flavor. I made it with chicken as it is traditionally made. You can also use lamb or beef.

Yes, I get the irony. Fesenjan is not a heart friendly dish but I do think it showcases the pomegranate very well indeed! :)

For more recipes using POM, please check out their website.

Koresht - e - Fesenjan

**
Fesenjan tastes better the longer it sits, atleast overnight. So, try to be patient and plan ahead.
It is important to cook the sauce until the oil renders from the nuts.
**

1-1/2 lbs chicken bone-in thigh and leg meat
1 large onion, sliced thin
2 cloves of garlic, minced
1/2 lb walnuts, toasted and ground
3-1/2 cups POM wonderful pomegranate juice
1/2 tsp cinnamon
1/2 tsp nutmeg
1-2 T sugar (depending on taste and sweetness of juice)
1/2 tsp cardamom powder
2 T lime juice
salt and pepper to taste
3 T olive oil

Brown chicken pieces in a heavy bottomed pan in 2 tablespoons of oil. Remove and reserve. Add some more oil and saute onions until soft. Add the garlic and saute for a few more minutes. Season with salt, pepper, cinnamon and nutmeg and fry for a minute.

Mix in the walnut paste into the onion mixture. Add the browned chicken pieces and toss to coat with the walnut and onion mixture. Stir in the pomegranate juice. Bring the mixture to a boil and then reduce heat to low and simmer for atleast an hour until the sauce is thickened, the walnuts release their oil and the sauce has reduced to about half the original volume.

Stir in lemon juice and sugar according to taste. Adjust seasoning if needed. Continue cooking for a 20 more minutes. A minute or two before taking off the heat, mix in the ground cardamom.

Let cool to room temperature and refrigerate overnight. Next day, if the sauce is too thick, stir in 1/2 cup of warm water and bring to boil. Serve over hot white rice, garnished with walnuts. I would have sprinkled some fresh pomegranate as well, but I did not have any on hand.

Fig and Apricot Cheesecake


Mmm.. I like spring cleaning my pantry, mostly because it gives me the perfect excuse and free reign to use a bit of creativity and make a bunch of stuff. After all, 'It'll go bad soon, if not used' is a compelling argument that even my husband cannot find a counter for! Ha!

So, when I found the mostly unused bar of cream cheese (which, I diligently buy every time I run out of it, even though I never have bagels at home!), I decided to make cheesecake. That happened Monday. But, I dragged my feet about it for two days, because, plain vanilla cheesecake sounded boring and nothing inspiring struck me. Yesterday, I walked by the organic grocers next door and saw these luscious black figs and that sent my mind into overdrive.

I tossed around pairings in my mind to go with the figs in the cheesecake and settled on apricots and port wine sauce. I made fig and apricot cheesecake topped off with a warm port wine - cognac sauce. I actually used a short cut for the sauce using some of the incredibly good porto et cognac gelee that I picked up in Montreal. But, you can easily make a simple reduction of port wine, sugar and a tiny bit of lemon juice.

This was a really fun, rewarding exercise. I made up the recipe as I went and substituted some of the traditional ingredients (that I did not have on hand) with stuff that was in my pantry. To my honest surprise, some of them worked much better than I expected.

I was out of Graham crackers and so, I made the crust with ground glucose biscuits (Parle G for those familiar with it!) and almonds. It came out nice and crumbly and perhaps, because of the glucose in the biscuits and not to mention the almonds was more flavorful than the traditional cracker crust.

The fig and apricot reduction puree was flavored ever so slightly with dark rum and honey. I blended the puree into the cheese cake mixture and for added punch made a lava center of it as well. So, even if the mild flavors of the fruits are not sufficiently bold in the cheesecake the puree brings them to the forefront with every bite.

I actually intended to make one 4 inch size cheesecake but I ended up with about a cup more than I needed of the cheese cake mixture. So, I spooned the remainder into a couple of ramekins over a base of the fig-apricot puree. Something like an upside down cheese cake, only I could not really get it out of the ramekins. Nevertheless, it was just as yummy scooped out of the containers directly as it was pretty arranged in the traditional layers!


Fig and Apricot Cheesecake with Port Wine and Cognac Sauce
(one four inch cheese cake)


** The cheesecake bakes in a water bath. To prevent seepage into the crust, generously and tightly wrap the spring form pans with foil. **

For the crust:
6T ground glucose biscuits
1 T ground almonds
1/2 tsp almond extract
2 T melted butter

For the fig-apricot puree:
1/2 cup fresh ripe figs
3-4 dried apricots
1 T honey
2 tsp rum
1/4 cup hot water

For the cheesecake:
6 oz cream cheese, room temperature
1 egg, room temperature
1/4 cup mascarpone cheese, room temperature
1/2 tsp almond extract
3/8 cup sugar
pinch of salt

2 tsp of warmed port wine-cognac gelee or reduced port wine sauce
Preheat oven to 350 degrees and heat water for the water bath. Soak apricots for about 10 minutes in hot water. Remove and chopped the apricots and the reserve the water. Grind biscuits and almonds to a fine powder and with fork mix in the butter and extract to a meal like texture. Press the crust into the base of the spring form pan. If you like crusty sides as well, make more of the mixture as needed.

Bake the crust for 10-15 minutes until it is golden. Meanwhile, mix together the figs (chopped), apricots, honey and about 3 tablespoons of the apricot water in a small sauce pan. Cook the fruits over low heat till they become very soft and the water reduces to 1/2 the original volume. Cool the mixture and puree it.

Beat the cream cheese and sugar together until creamy and smooth (about 3 minutes). Add the egg and beat to incorporate. Blend in the mascarpone, almond extract and salt. Mix in about a third of a cup of the fig-apricot puree.

Wrap the spring form pan tightly in foil. Spoon in the cheese cake batter into the pan until half full. Spread about 2 T (I eyeballed it) of the fig puree over the batter. Fill the rest of the pan with the cheesecake batter.

Place the pan inside a larger oven proof pan. Pour hot water so it comes up to half the level of the cheesecake filling. Bake for 45 minutes until almost done. Turn off the oven and let the cake gradually cool down for an hour inside it so it doesn't crack on top. Remove the pan from the water bath and cool on rack to room temperature. Refrigerate for atleast 6 hours, overnight is better.

Before serving, lightly warm the port wine sauce and spoon over the top of the cheese cake. Garnish with a couple of fig halves and serve.

Oil tarts are in!


Yes, you read it right! Not butter.... oil. When I first came across the recipe for a tart shell with oil instead of butter on Passionate about baking, I was instantly inspired to make it! I have long wondered if oil could create that wonderful flakiness that is most loved about a butter crust. After all, the Indian paratha has a lovely flaky texture and is made with oil or ghee. So, armed with a recipe to help me out with the measures, I was ready to test my hypothesis .

Recently, a friend of ours introduced us to a small farmers' market in midtown Manhattan (52nd street between 8th and 9th avenues). Bang in the center of prime real estate, it carried fresh produce at admirably reasonable prices. When I found a butternut squash that was perfectly sized for two, I was sold!

As soon as I saw the squash, I decided to make roasted butternut squash tart with the new healthy version for the crust. That crust experiment unfortunately, did not go as well as I expected. As I followed the recipe, I felt that the dough was a bit dry and tough and it stayed that way after being baked as well. The tart filling was moist but the crust was way too hard. But, I did not give up. I decided to give the oil tart another chance, this time, with some modifications.

For take #2, I decided to make rosemary tart with a layered filling of ricotta, marinara and zucchini, like a lasagna. I made the crust with minced fresh rosemary. I also upped the amount of water and substituted half the olive oil with canola oil. The result was much better than the previous time.

The crust was soft, supple, light yet flavorful. But, it did not turn out flaky! A butter crust definitely has a better texture and arguably a richer flavor. However, I liked the oil crust quite a bit. It is a pretty good, much healthier version, which, is a whole lot easier to work with (especially with no constraint to work quickly to prevent the butter from melting!).


Oil Tart Crust
adapted from
here

1-3/4 cup spelt wheat flour
1 tsp salt
1/2 tsp pepper
1 tsp minced rosemary
1/2 cup + 2T ice cold water (I did this more on a add as you go basis. So it could be a bit more or less)
1/8 cup olive oil
1/8 cup canola oil
2 tsp oil

Sift together flour, salt, pepper and rosemary. Add the oil and mix it in with a fork. Add water slowly, mixing it in and kneading the dough until it comes together into a ball.

Turn the dough out onto a lightly floured work surface. Using a floured rolling pin, roll the out into a circle large enough to fit your tart pan. Transfer the dough carefully into the prepared pan and line it without stretching. Trim off the excess dough with the rolling pin. Refrigerate for atleast 30 minutes.

Blind bake the crust in oven preheated to 375 degrees for 15 minutes. Remove pie weights and continue baking for five more minutes. Dial down the oven to 350 degrees.

Fill the tart with filling of choice (suggested recipes below). Return to oven and bake for 30 to 40 minutes until the tart is fully cooked. If using mozzarella on top, reserve the cheese until the last 7 minutes, then sprinkle over and cook until the cheese is melted.

Remove the tart from the oven and cool for 5 minutes. Sprinkle the top with parmesan, chives or other garnish and serve.

Roasted Butternut Squash Tart

1 oil tart crust blind baked
1-1/4 cup homemade (or store bought) marinara sauce
1 cup roasted butternut squash dices
3/4 cup grated fresh mozzarella cheese
2 tsp chopped chives or scallions for garnish

Spread half the marinara sauce at the bottom of the tart shell. Top the layer with the roasted butternut squash pieces and then a half cup of grated mozzarella. Spread another layer of marinara sauce.

Bake for 30 minutes. Sprinkle the remaining cheese over the tart in the last 7 minutes and finish baking. Garnish with chives/scallions and serve.


Zucchini Lasagna Tart
adapted from
101 cookbooks

1 oil tart baked as above
1 medium zucchini thinly sliced
1-1/4 cups marinara sauce
1-1/4 cups ricotta cheese
1 T grated parmesan cheese

Spread half the ricotta cheese on the bottom of the tart. Then, spread a third of the sauce over it. Line the zucchini slices around the tart in an overlapping fashion.

Repeat the cheese, sauce and zucchini layers. Top of with the remaining sauce and bake for 30 to 40 minutes until tart is fully cooked.

Let tart rest for 5 minutes, garnish with grated parmesan and serve.