chocolate

Zucchini-Cocoa, Lime-Ginger and Smoked Salmon Mousse Verrine - Velveteers March 2010

Verrine

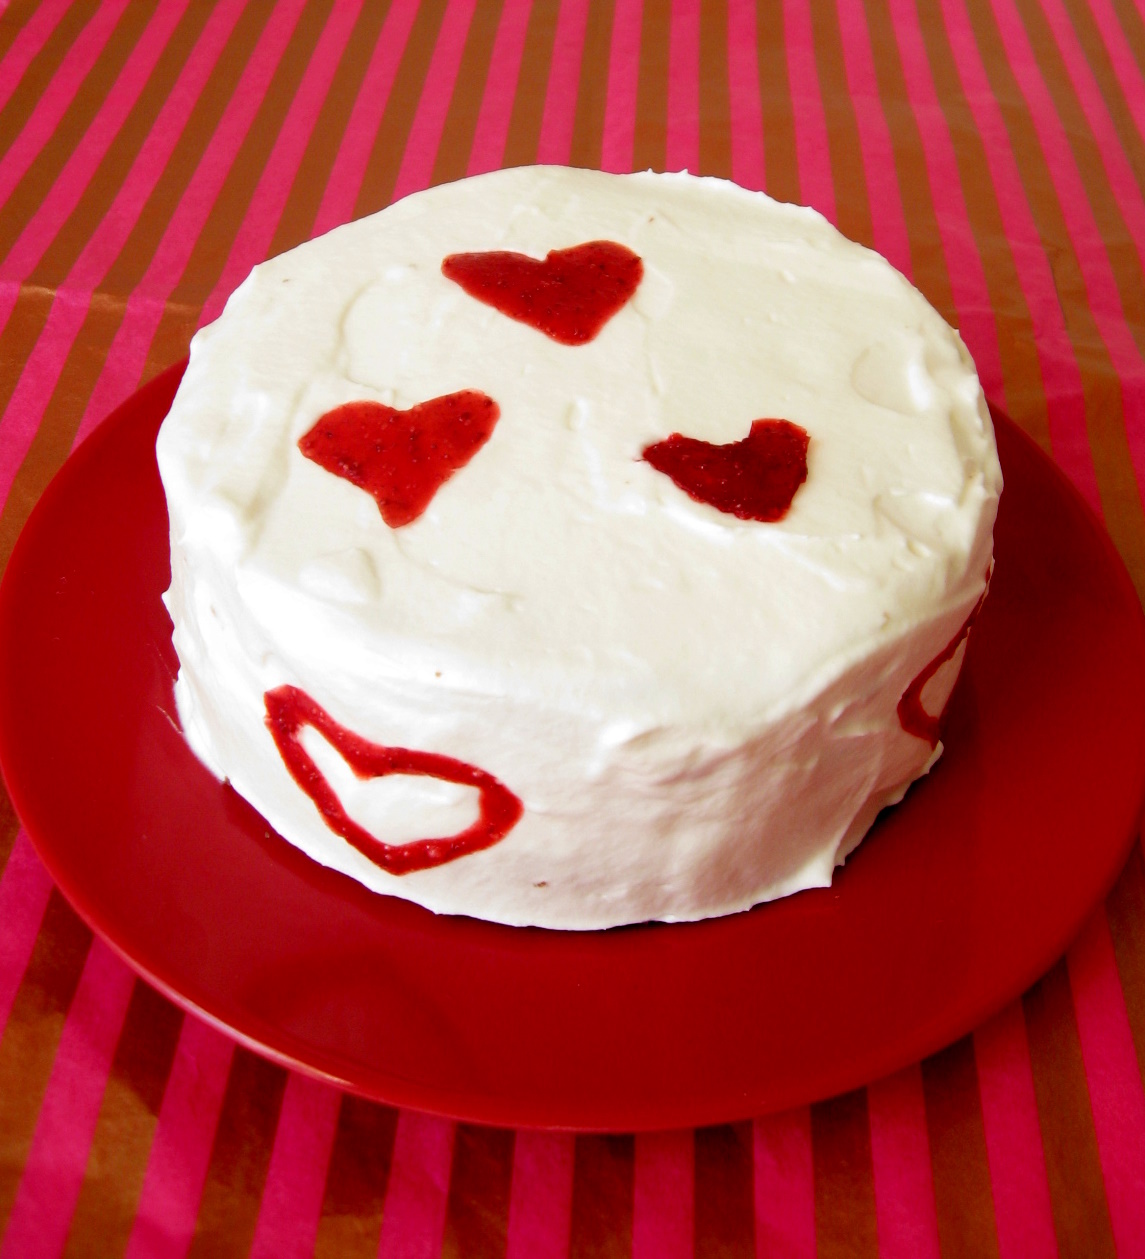
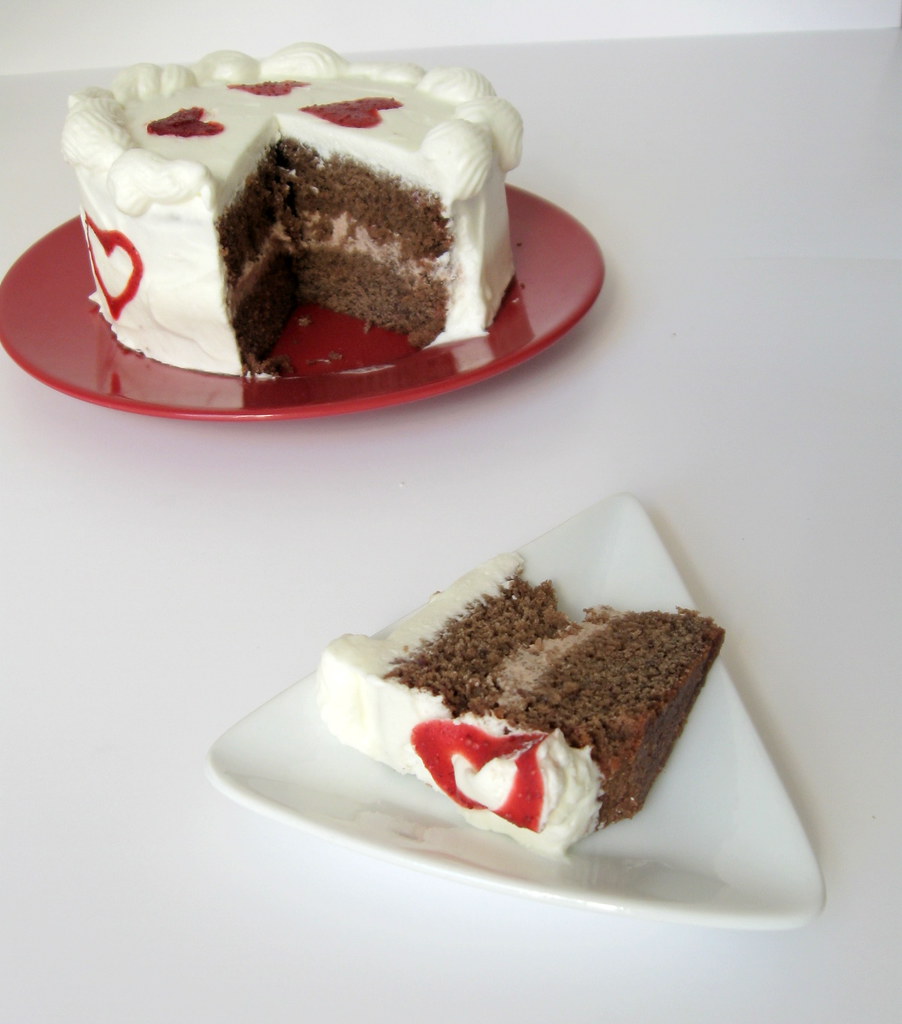
The Velveteers band again. This month we decided to challenge ourselves with making savory Verrines.

A verrine is a confection, originally from France, made by layering ingredients in a small glass. It can be either sweet or savoury, making a dessert or snack (source: Wikipedia).

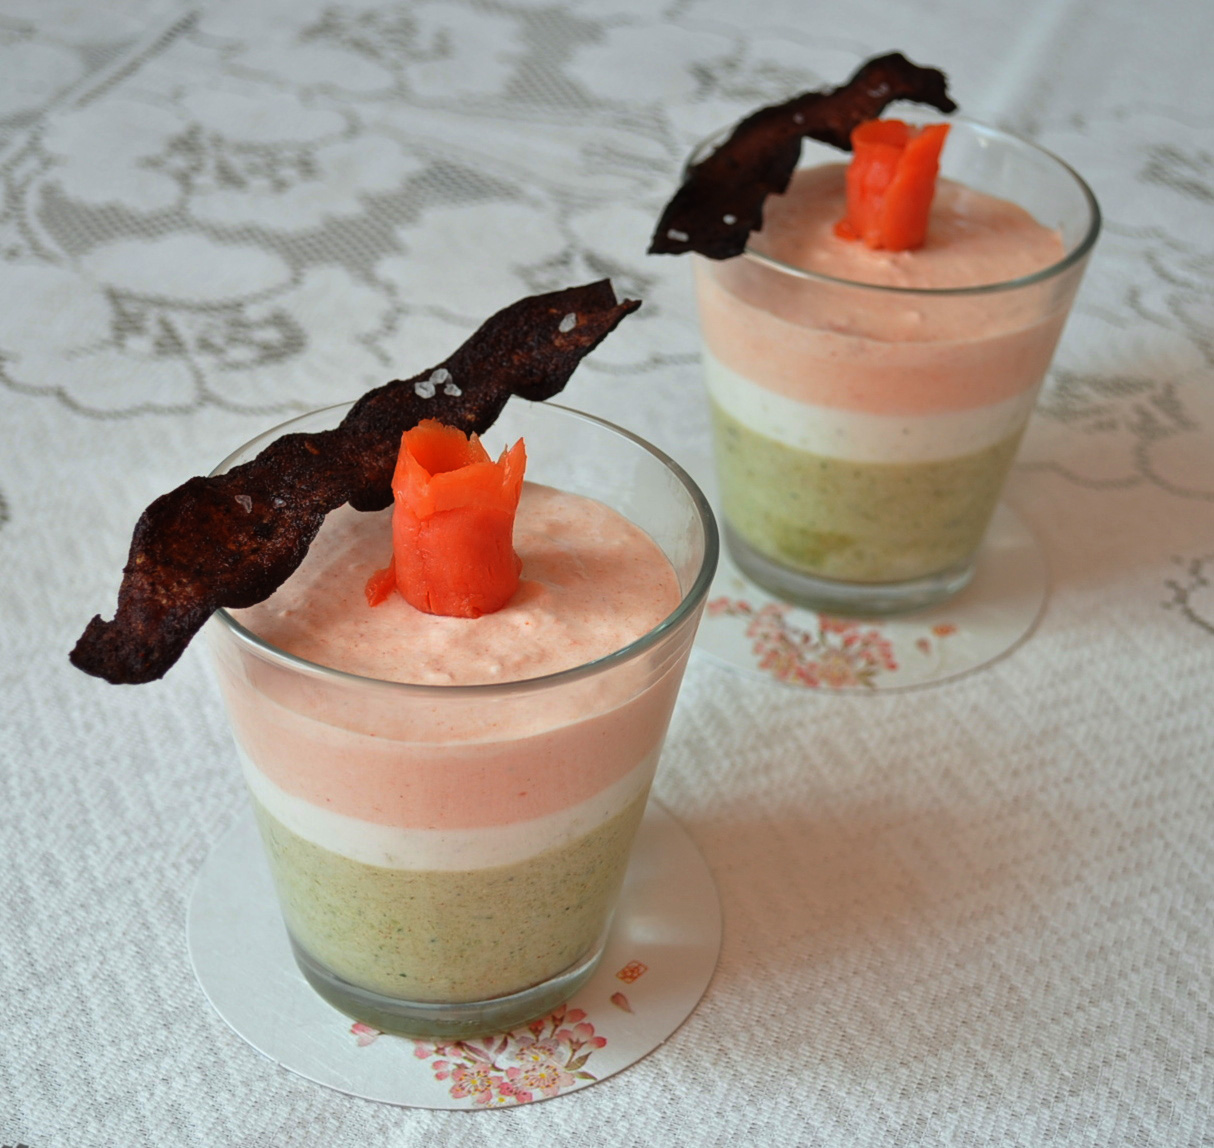
Around the blogosphere, there have been many a verrine showcased but they were mostly of the sweet kind. And, so, we decided to go savory (I must say, that, was well received by Mr. FSK as well!). To push the envelope even more, each of us, Pam, Al, Aparna and I, chose one ingredient that must be used in our verrine. So we came up with - salmon, chocolate, cheese and squash; quite an eclectic combination, especially with the chocolate throwing one off the loop!

Verrine from top

I have long wanted to make verrines and have dreamed up quite a few flavor combinations, sweet and savory, that I have jotted down as drafts in my mailbox, my virtual notes diary. I had even bought glasses for them a couple of months back. But, this was the first I was actually executing. So, I was really thrilled and looking forward to it.

I was reasonably sure on how to use the squash, salmon and cheese but the chocolate was testing me quite a bit. Finally, I decided to use cocoa and pair it with zucchini (for the squash) because honestly, I could not think of anything to pair with that made sense with the rest of the ingredients.

Verrine 1

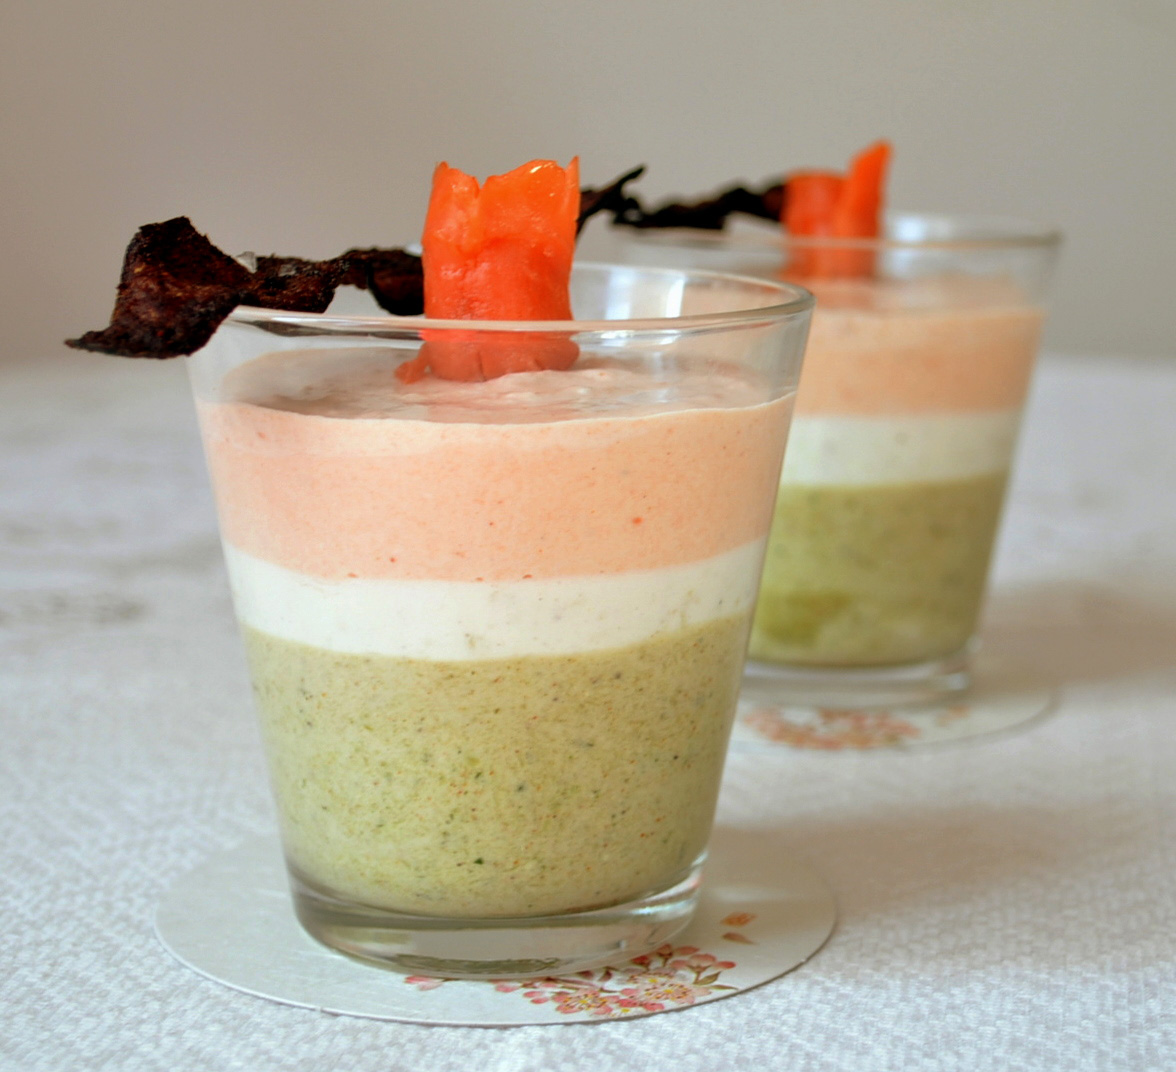
I had decided to make a Zucchini-Cocoa Mousse and Salmon Mousse. However, they did not quite seem to just go with each other on their own. I felt there needed to be a coordinating layer or sorts. When I tasted the zucchini-cocoa mousse, I felt like it needed a bit of kick. So, I went back to the drawing board.

I wanted something light so as to not overpower either the zucchini (which is quite delicate in flavor) or the salmon and yet connect them seamlessly. Citrus popped into my head as did ginger. Both, I think pair very well with zucchini and salmon individually and I figured that should work. So, became my middle layer of Lime and Ginger Mousse.

I made the zucchini and lime layers with whipped cream and used Cream Cheese to make the salmon mousse, lending it a richer texture. To top it off, I made a chilli-cocoa crusted zucchini chip.

Verrine 3

Verdict: The verrine was really good. The flavors came through individually and melded well together. The citrus kick was just enough to lighten the richness of the salmon mousse and brighten the zucchini. I think the chip was a bit overpoweringly bitter, probably because I used a lot of cocoa. Next time I think I'll sweeten it with some honey for a mellower flavor. All in all, Mr. FSK polished them off eagerly; So, I call it a success!


Zucchini-Cocoa, Lime-Ginger and Smoked Salmon Mousse Verrine
(serves 2)

Zucchini-Cocoa mousse:

1 zucchini, sliced; reserve some long strips for the chips
2 tsp unsweetened cocoa powder
1 tsp dried zucchini powder
1/2 cup whipping cream (you will use only half of it, reserve the other for the 2nd layer)
1/2 tsp of gelatin or agar-agar
1 T hot water
salt and lemon pepper per taste

Blanch the zucchini in hot water until translucent. Transfer immediately to ice cold water to retain the green color. Let it cool. Meanwhile, dissolve gelatin in a tablespoon of hot water.

Puree the cooled zucchini with the gelatin water to a smooth texture. Fold in cocoa, dried zucchini powder and season with salt and pepper. Whip the cream to stiff peaks and fold in half of it to the zucchini mixture.

Divide the zucchini-cocoa mousse equally between two glasses. Cover with plastic wrap and refrigerate for atleast 4 hours to let it set.

Note: You can make zucchini powder by thinly slicing zucchini and letting it sit in an off oven overnight or until it has completely lost it's moisture content and then grinding it to a fine powder.


Lime-Ginger Mousse:

zest of half a lime
juice of half a lime
1/4 tsp gelatin
1 inch chunk of ginger, grated very fine
remaining half of whipped cream from above
salt to taste

Combine the zest, juice and ginger. Add the gelatin and heat the mixture until the gelatin dissolves. Season with salt. Fold in the whipped cream and layer over the zucchini mousse layer. Let set in the refrigerator for atleast 4 hours.

Smoked Salmon Mousse:

3 T smoked salmon of your choice + more for garnish
3 T cream cheese at room temperature
1 T heavy cream
1 T hot water
1/4 tsp gelatin
salt and pepper to taste

Dissolve the gelatin in the hot water. Whip all the ingredients together to make a smooth, creamy mixture. Pipe into the glasses over the lime mousse layer. Allow to set for atleast 4 hours.

Chilli-Cocoa Crusted Zucchini Chips
(this is the modified version based on my experience and what I think will work better)

2 zucchini slices, sliced lengthwise with skin on
1 tsp unsweetened cocoa
1 tsp paprika
2 tsp honey
1/4 tsp salt

Mix together the honey, cocoa, paprika and salt and rub the zucchini slices generously. Cover with wrap and let marinate for a few hours. Deep fry them to crisp and sprinkle with sea salt crystals.


--------------------------------------------------------------------------------

Velveteers was started by Aparna, Asha, Alessio and Pam, who are passionate about different cuisines and food in general. Each month, we will attempt a new dish and share our experiences and the recipes we used. If you’re interested in joining the Velveteers, please feel free to drop by our food blogs and leave a comment.

Do, check out what the other Velveteers have created:

Alessio - http://recipetaster.blogspot.com/

Tiramisu for Daring Bakers February 2010

Tiramisu Close up

The February 2010 Daring Bakers’ challenge was hosted by Aparna of My Diverse Kitchen and Deeba of Passionate About Baking. They chose Tiramisu as the challenge for the month. Their challenge recipe is based on recipes from The Washington Post, Cordon Bleu at Home and Baking Obsession.

Weird, how someone, somewhere reads your mind, isn't it? Take for instance, this Daring Bakers challenge. I have been meaning to make Tiramisu ever since I first saw it so prettily displayed at our neighbourhood Italian bakery. Gorgeous individual portions of, what to me looked like, layered mousse and biscuits. I wanted to recreate all that lovely-ness. Now, just how did Deeba and Aparna know my inner mind workings, I don't know. Perhaps, there is some sort of metaphysical connection between us... Hmmmmm..

So, if you are wondering why I am rambling on about minds, metaphysics and such... It's just the influence of Dan Brown's latest in the Langdon series. He has opened my eyes to this whole new (to me) world of "Noetic Science". Apparently, the field really exists and not a mere figment of his imagination (oh!! soo many puns in that sentence!). I googled.. Even Wikipedia has an article on Noetic Theory (Quid Pro Quo!). The basic hypothesis (and belief) behind the science is that the human mind is capable of physical change through the power of thinking!

Rather cool, I think. Well, we'll just have to wait and see how much of it can be scientifically proven. So, anyway, the book is all over it. And Mr. Brown, being who he is draws a ton of parallels between it, the Masons and the religions of the world. Decent book; I am about two-thirds through it and while not compelling or un-put-down-able, it's an interesting read. Maybe, there will be a twist in the end...

Tiramisu

Anyway, back to the subject of the post, the Tiramisu. I chose to make individual portions for two reasons. One, that's how it looks in the store. Two, I had been looking for an opportunity to use the pastry rings that Deeba had sent me when I was in India. It's was a pre-ordained match - the rings and a challenge co-hosted by her! Circles within circles, or what! :)

I pretty much followed the recipe. The only changes I made were using rum instead of marsala wine for the zabaglione, rum-ed coffee for soaking the savoiardi, orange zest for flavoring (no extracts at all) and chocolate whipped cream because I had some left over from making something else. The last is why my cream doesn't look yellow but a more muddled color. But, take my word, it tasted fantastic!

It was rather an elaborate process, with many different components that all come together nicely for a rich dessert. The savoiardis were ok for me; a bit too eggy eaten as is but gave a nice sponginess and body to the tiramisu. The mascarpone was creamy and rich. And yes, I panicked when I was making it because it didn't seem to be doing anything but after the refrigeration, it firmed up so nicely! I made extra, so happy!

Tiramisu single

You know the funny thing; for all my wanting to make tiramisu, I honestly don't remember tasting one or if I have (as Mr. FSK insists), it's actual taste. So, I don't know how this creation compares to the store. But, it was real good, stand alone!

Now, the litmus test is a couple of friends who just love Tiramisu. I saved a portion for them. My fingers are crossed and I'll keep you updated on the results! :) Meanwhile, enjoy my creation and visit the Daring Kitchen for everyone's gorgeous creations!!

The recipe below includes the tweeks I made for the individual portions.

Tiramisu
(Recipe source: Carminantonio's Tiramisu from The Washington Post, July 11 2007)
Makes 3-4 individual serves depending on size

For the zabaglione:
1 large egg yolks
1.5 T sugar
1/8 cup rum
1/2 tsp orange zest

For the vanilla pastry cream: (this makes twice the amount needed)
1/4 cup sugar
1 T all purpose flour
3/4 tsp finely grated orange zest
1 large egg yolk
3/4 cup whole milk

For the whipped cream:
1/2 cup chilled heavy cream (we used 25%)
1/8 cup powdered sugar
1/2 T unsweetened cocoa powder

To assemble the tiramisu:
1/2 cup brewed espresso, warmed
1 T rum extract
1/4 cup sugar
1/6 cup mascarpone cheese
20-25 savoiardi/ladyfinger biscuits (you may use less)
2 tablespoons unsweetened cocoa powder

To make the zabaglione:

Heat water in a double boiler. If you don’t have a double boiler, place a pot with about an inch of water in it on the stove. Place a heat-proof bowl in the pot making sure the bottom does not touch the water.

In a large mixing bowl (or stainless steel mixing bowl), mix together the egg yolks, sugar, rum and zest. Whisk together until the yolks are fully blended and the mixture looks smooth.

Transfer the mixture to the top of a double boiler or place your bowl over the pan/ pot with simmering water. Cook the egg mixture over low heat, stirring constantly, for about 8 minutes or until it resembles thick custard. It may bubble a bit as it reaches that consistency.

Let cool to room temperature and transfer the zabaglione to a bowl. Cover and refrigerate at least 4 hours or overnight, until thoroughly chilled.

To make the pastry cream:

Mix together the sugar, flour and zest in a medium heavy-bottomed saucepan. To this add the egg yolk and half the milk. Whisk until smooth. Now place the saucepan over low heat and cook, stirring constantly to prevent the mixture from curdling.

Add the remaining milk a little at a time, still stirring constantly. After about 12 minutes the mixture will be thick, free of lumps and beginning to bubble. (If you have a few lumps, don’t worry. You can push the cream through a fine-mesh strainer.)

Transfer the pastry cream to a bowl and cool to room temperature. Cover with plastic film and refrigerate at least 4 hours or overnight, until thoroughly chilled.

To make the whipped cream:

Combine the cream, cocoa and sugar in a mixing bowl. Set aside for 5 minutes. Beat with an electric hand mixer or immersion blender until the mixture holds stiff peaks. Set aside.

To assemble the tiramisu: (individual portions)

Place the pastry rings/molds on base. Mix together the warm espresso, rum extract and sugar in a shallow dish, whisking to mix well. Set aside to cool.

In a large bowl, beat the mascarpone cheese with a spoon to break down the lumps and make it smooth. This will make it easier to fold. Add the prepared and chilled zabaglione and pastry cream, blending until just combined. Gently fold in the whipped cream. Set this cream mixture aside.

Now to start assembling the tiramisu.

Working quickly, each ladyfinger in the sweetened espresso, about 1 second per side. They should be moist but not soggy. Immediately transfer each ladyfinger to the inside of the dessert ring, placing them side by side in a single row. You may break a lady finger into two, if necessary, to ensure the base of your dish is completely covered.

Spoon some of the cream mixture on top of the ladyfingers, then use a rubber spatula or spreading knife to cover the top evenly, all the way to the edges. Repeat to create one or more layers, alternating the ladyfingers and the cream mixture for each layer. Clean any spilled cream mixture; cover carefully with plastic wrap and refrigerate the tiramisu overnight.

To serve, carefully remove the plastic wrap. Run a sharp paring knife along the inner edges of the ring and ease it up. The tiramisu will stay on the base. Sprinkle the top with cocoa powder using a fine-mesh strainer or decorate as you please.


Mascarpone Cheese
(Source: Vera’s Recipe for Homemade Mascarpone Cheese)
This recipe makes twice the amount you need for the Tiramisu

1 cup whipping (36 %) pasteurized (not ultra-pasteurized), preferably organic cream
1/2 to 1 T fresh lemon juice

Bring 1 inch of water to a boil in a wide skillet. Reduce the heat to medium-low so the water is barely simmering. Pour the cream into a medium heat-resistant bowl, then place the bowl into the skillet. Heat the cream, stirring often, to 190 F. If you do not have a thermometer, wait until small bubbles keep trying to push up to the surface.

It will take about 15 minutes of delicate heating. Add the lemon juice and continue heating the mixture, stirring gently, until the cream curdles. Do not expect the same action as you see during ricotta cheese making. All that the whipping cream will do is become thicker, like a well-done crème anglaise. It will cover a back of your wooden spoon thickly. You will see just a few clear whey streaks when you stir.

Remove the bowl from the water and let cool for about 20 minutes. Meanwhile, line a sieve with four layers of dampened cheesecloth and set it over a bowl. Transfer the mixture into the lined sieve. Do not squeeze the cheese in the cheesecloth or press on its surface (be patient, it will firm up after refrigeration time).

Once cooled completely, cover with plastic wrap and refrigerate (in the sieve) overnight or up to 24 hours.


Savoiardi Biscuits/ Ladyfingers
(Source: Recipe from Cordon Bleu At Home)
This recipe makes approximately 24 big ladyfingers or 45 small (2 1/2" to 3" long) ladyfingers.

3 eggs, separated
6 tablespoons /75gms granulated sugar
3/4 cup/95gms cake flour, sifted (or 3/4 cup all purpose flour + 2 tbsp corn starch)
6 tablespoons /50gms confectioner's sugar,

Preheat your oven to 350 F (175 C) degrees, then lightly brush 2 baking sheets with oil or softened butter and line with parchment paper. Beat the egg whites using a hand held electric mixer until stiff peaks form. Gradually add granulate sugar and continue beating until the egg whites become stiff again, glossy and smooth.

In a small bowl, beat the egg yolks lightly with a fork and fold them into the meringue, using a wooden spoon. Sift the flour over this mixture and fold gently until just mixed. It is important to fold very gently and not overdo the folding. Otherwise the batter would deflate and lose volume resulting in ladyfingers which are flat and not spongy.

Fit a pastry bag with a plain tip (or just snip the end off; you could also use a Ziploc bag) and fill with the batter. Pipe the batter into 5" long and 3/4" wide strips leaving about 1" space in between the strips.

Sprinkle half the confectioner's sugar over the ladyfingers and wait for 5 minutes. The sugar will pearl or look wet and glisten. Now sprinkle the remaining sugar. This helps to give the ladyfingers their characteristic crispness. Hold the parchment paper in place with your thumb and lift one side of the baking sheet and gently tap it on the work surface to remove excess sprinkled sugar.

Bake the ladyfingers for 10 minutes, then rotate the sheets and bake for another 5 minutes or so until the puff up, turn lightly golden brown and are still soft. Allow them to cool slightly on the sheets for about 5 minutes and then remove the ladyfingers from the baking sheet with a metal spatula while still hot, and cool on a rack.

Store them in an airtight container till required. They should keep for 2 to 3 weeks.

Chocolate and Fruit Spiced Bread... And a Reminder

Choc fruit Spice Bread close up

The weather is rather unpredictable these days. One day it's bright and sunny and the next grey and snowy keeping one largely stuck indoors. Though I must say, I was rather proud of myself yesterday for having trudged through the city slush to the gym!! Anyway, such eccentricities aside, what I usually feel like doing is cuddling with a hot cuppa, reading food blogs and dreaming of all lovely things I can bake...

The aromas and warmth wafting from a fresh baked something can make even a dungeon feel comfortable! So it is natural that one's thoughts trend that way when the outside is muggy and dis-spiriting. Don't get me wrong, snow is beautiful and all that but I am not a winter person and add to that the city can make even beauty turn beast! So, after the first delusional joy that fresh snow brings, reality kicks in and you realize that reaching somewhere with wet sneakers is NOT cool..

Ah well! Clearly I can't wait for the weather to thaw. In the meantime, I am going to try to be shiny and sunny by popping things out of my oven!:) So yesterday, on one such day, I decided to bake bread. Trolling through the net, I came across a lovely recipe on Bon Appetit. It had fruit, chocolate and warming spices in it - So perfect!


And, it came to me just in time for Meeta's Monthly Mingle submission. This month's event is hosted by lovely Jamie and she chose the theme to be Bread and Chocolate. Not a surprise, given it's Jamie, non?! :) So anyway, the thought of the baking this made me happy.

I used dried cranberries and some diced candied pomelo peels that I had made earlier this month when I saw the pomelo on the grocery shelves and pounced on it. You see, so many people had been raving about the said fruit, it seemed a blasphemy that I hadn't tried it yet. Well, anyway, the fruit was consumed and not liked very much, I must add... It is TART!! For me, fruits need to be sweet. Oranges are the end of my sweetness rope.

Bread + cranberries + citrus peel + chocolate

In it's defense, the candied peels taste good. It's like eating a sour patch candy; you scrunch up your face, shake your head, swallow and then reach for more. They added a nice touch of tang to the bread. For the warmth I added fresh cinnamon and nutmeg - typical winter spices...

After glutenifying overnight, shaped into a log this morning (I woke up early.. Not for this purpose, I swear!) and rising to double, the dough went into the oven. As soon as it hit the heat, the aromas arose like ghosts in the dark. Ah! such heartwarming smells filled my apartment.. Sweet, spicy, warm, enveloping.. I could just picture it like in cartoons; the tempting swirls of aromas intoxicating me with optimism. I was doing taxes while it was baking. It made even that seem not so bad! :)

Choc Fruit Spice Bread Slices

So there, I am happy the day was snowy, I got to make this bread (not to mention give cause to take pride in myself)... Because, it's awesome!!! It has a nice cake like texture which makes it perfect tea accompaniment. Now that I mention it, am off to have a slice with my tea now.. ciao people! :)

Oh and before I sign off, I just wanted to leave a gentle reminder about the FSK Cafe event - Same Notes, Different Highs. This month's ingredients to highlight (in two distinct flavor profiles) are Tomato, Mozzarella and Basil. The deadline for submission is March 15, 2010. For details about the event and how to submit an entry please visit my original announcement here.

Also, sending this bread to our friendly, neighbourhood Yeastspotting team!


Chocolate and Fruit Spiced Bread
(adapted from
Bon Appetit)

1/2 cup warm whole milk
1 envelopes active dry yeast
1/4 tsp plus 1/4 cup sugar (add more if you like it sweeter)
1- 3/4 cups all purpose flour + more for dusting and while kneading
1-1/2 tsp ground cinnamon
1 tsp fresh grated nutmeg
1 tsp salt
1 large egg, room temperature
3 T unsalted butter, room temperature

2/3 cup mixture of dry fruits (I used cranberries and diced pomelo peel)
1 1.2 oz bitter sweet chocolate, rough chopped

Stir milk, yeast, and 1/4 tsp sugar in small bowl and let stand until mixture bubbles, then stir.

Meanwhile, keep ready flour, sugar, nutmeg, cinnamon and salt in a medium bowl. Add the yeast mixture whisking (I used a wire whisk. If you have a Kitchen aid then use the paddle attachment) the liquid around until dry shaggy mass forms, scraping down bowl occasionally, about 2 minutes. Add the egg and whisk until incorporated and it comes together into a moist soft dough that.

Add butter by 1 1/2 tablespoonfuls and incorporate fully before adding more. This was a bit tricky. I had to use a bit more flour so the dough did not keep slipping out of my hand. But persevere and it'll know who is boss!

Let dough rest in bowl 10 minutes (dough will become less sticky). Mix chocolate and dry fruits in a bowl. Place the dough in large bowl. Sprinkle chocolate mixture over dough and knead just until incorporated. Transfer dough to a large buttered bowl. Cover with plastic wrap and let dough rise at room temperature until almost doubled in volume. Punch dough down; cover with plastic wrap and refrigerate overnight.

Butter a 9x5-inch metal loaf pan. Turn cold dough out onto work surface. Form dough into a log about 9 inches long. Place the logs in prepared loaf pans. Cover pans with plastic wrap. Let dough rise until almost doubled in volume.

Position the oven rack in center of oven and preheat to 400F. Brush tops of risen bread loaves with butter. Pop into oven and lower the heat to 375F. Bake until top crust is deep brown and tester inserted into center of each loaf comes out clean, about 35 minutes. Remove from oven; let loaves rest in pans 5 minutes. Cool on rack to room temperature.

Dust with powdered sugar, slice and enjoy!

I Heart Thee - Couple's Velvet Cake {Valentine's Day Post}

Couple's Velvet Cake

YAY! This cake got voted to FoodBuzz Top 9 on 14 Feb 2010. Thanks for all the LOVE!!


With Valentine's day just a couple of days away, the blogosphere is filled with yummy things Red and lovely. It isn't surprising that the spirit carried over to the Twitter World. What with mouth watering posts popping up all over from tweet friends, it was only inevitable that one starts thinking up stuff for the cause, even though Mr. FSK and I do not observe the "day" (that is only 'coz our anniversary is a few days earlier! :)).

So when Aparna asked me if I wanted to bake a red velvet cake in time for V-day with fellow Velveteers, Pam and Alessio, I jumped on it. Truth be told, I have not found the cake very appealing primarily because of the amount of artificial coloring that goes into it. Somehow, the idea of making it red by adding a poundful of color just didn't seem right. But, I remembered the history of the cake and the color from a Throwdown episode I had seen a while back and I wanted to try my hand at some of this practical chemistry (it was one of favorite subjects in school.. Loved organic chemistry, not so much inorganic).

The original cake made eons ago, relied on the reaction between the buttermilk and vinegar in combination with the chocolate to produce the reddish tinge that gave the cake the name. I wanted to have some fun with food chemistry and the rule to NOT use artificial coloring for baking with these awesome bloggers was just the right motivation.

So, I did research. I found out that to have any chance of the natural reaction, I needed to use regular cocoa and not the Dutch processed (which is usually coveted) because of the latter's alkaline nature. Fortunately, that was the cocoa I had at home. Then I learnt that the cultured buttermilk that you get in the stores are pretty tame pH wise to cause a pop. So, I decided to make my own buttermilk...

Velvet cake sliced
Clearly I have quite a ways to go on piping frosting prettily!


I remember my mom used to skim the cream off the boiled milk everyday and store it in a jar till there was enough to make butter. Then she would churn it by hand to separate the butter and buttermilk. A major portion of that butter would then be converted to ghee. It all seemed a long, tedious process to me and I was a bit deflated, at first, when I realised I had to make buttermilk.

Glory to Google, it wasn't to be so bad! This day and age, all you do is add heavy cream to the blender and whip at high speed, till the butter separates out. It was such a cool feeling!! The nice part is you can use the butter and the buttermilk you make in this cake. Now, nothing can beat all that homemade LOVE!!! :))

So, I was set and ready to bake. I whisked the buttermilk and vinegar, but, nothing seemed to happen, even after upping the amount of vinegar. I proceeded anyway and made the batter which was not quite the chocolate cake color but a duller brown, with a very very slight slant to red (or perhaps that was just me hoping!). Anyway, I wanted something red in it, so I added a couple of tablespoons of mashed thawed raspberries. They didn't do much to the overall color, just a few flecks of red here and there but I think they added to the moisture of the cake.

Now for the decoration. Typical frosting for red velvet cake is cream cheese based. But, I am not a big fan of it because cream cheese has a pronounced tang which needs a ton of sugar to make sweet. So I decided to go with a whipped cream frosting which is way lighter as well and lends better to delicate flavors.


Slice and sliced cake

Since it was a chocolate cake of sorts, I made the inside filling of chocolate & rum whipped cream and the outer frosting of rose whipped cream; rose being the symbolism for the day and all. Besides, I like rose flavor (love rose milk!). And, since I am mischievious by nature, I decided to go over the top and decorate with mini-hearts made of strawberry gelee. LOL..

Alhtough the cake did not come out red, it sure was velvety. The texture was serious melt-in-your-mouth. I think the buttermilk adds to the nice texture (Check out Alessio's post for an actual lesson in food chemistry.. fantastic!). There was just a hint of chocolate, which I didn't mind at all. And I loved the cream frosting; it was light, airy and mild (oh and rum soaked..haha). This is now my favorite cake recipe.

All in all, I thoroughly enjoyed working with the cake and giving in to some whimsical fancies, even if I failed at the chemistry (hey! it's all about the learning, not the grades, right?!).

Check out what the other Velveteers have created, all naturally colored -

Aparna - Eggless Red Velvet Cake
Pam - Red Velvet Cake (with beetroot juice)
Alessio - Raspberries Red Velvet Cake


Velvet Cake For Two

** Since it's for a couple, I sized it accordingly, you can triple portions for a 9 inch cake.

I was generous with the alcohol given the occasion. For a kid-friendly version, skip the alcohol**

Cake:
(Recipe adapted from Epicurious)

3/4 cup sifted cake flour (or 3/4 minus 2 T cup AP flour plus 2 T corn starch)
1 T unsweetened cocoa powder (natural, not Dutch processed)
1/3 tsp baking powder
1/3 tsp baking soda
pinch of salt
1/3 cup buttermilk
1 tsp distilled white vinegar
1/2 tsp almond extract
1/2 cup sugar
3 T unsalted butter, room temperature
1 egg, room temperature
2 T mashed, thawed raspberries

5 T rum
5 T water
1 T sugar

Preheat oven to 350°F. Butter and flour a 5inch by 3 inch cake pan. Sift together the flour, cocoa, baking powder, baking soda, and salt. Whisk buttermilk, vinegar, and extract in a small bowl. Using an electric mixer, beat sugar and butter in large bowl until well blended. Add the egg, beating until well blended. Add in dry ingredients alternating with the buttermilk mixture starting and ending with the dry. Beat in the mashed raspberries.

Pour batter into the pan (there may be a bit more than can fit. Don't over stuff). Bake for 30-35 minutes or until tester comes out clean. Cool in pans on racks 10 minutes. Turn cakes out onto racks and cool completely. Meanwhile, mix together the water, rum and sugar and set to cool.

Using a cake knife cut the cake into two horizontally (you can also bake in two pans. I only have one). Pour the rum mixture evenly on both halves and let it soak in. Generously spread the chocolate cream onto the base layer making it slightly thicker in the center as it will spread when the second layer is placed. Gently place the top layer and coat with a thick layer of the rose cream frosting. Decorate with strawberry hearts.

Frosting:

Chocolate and Rum Cream
1/2 cup heavy whipping cream
2 tsp unsweetened cocoa
1/3 cup + 2 T powdered sugar
2 T rum

Add the cocoa and rum to the cream and set aside for 5 minutes in the refrigerator. Start whipping at low speed and increase to the highest speed on your mixer. When it has doubled in volume, add the sugar slowly. Continue whipping until soft peaks form. Cool for atleast 15 minutes before spreading on cake.

Rose Cream
3/4 cup heavy cream
1/2 cup powdered sugar
1 T rose water

Use same procedure as above

Strawberry gelee hearts

1/4 cup strawberry puree
1/4 cup water
1-1/4 tsp gelatin

Bring the puree and water to a boil. Off the heat, add gelatin, whisk to incorporate completely. Cool to room temperature and then cool in fridge till it is just starting to set is fluid enough to pipe.

Pour into a ziplock bag. Make a tiny cut and pipe hearts onto a silpat sheet. Cool overnight to set. Peel off the hearts and place on frosting.