

Even though the berry season is just past, they are perfect for this bridge season in the frozen form. Whether you freeze them yourself or buy them frozen from the market, frozen blueberries are perfect for making compotes as the freezing concentrates the sugars in the fruit, needing no more when making the sauce.
Read Morepantry

Churn Baby, Churn! - Butter and Cheese at Home
There is a lot of debate, suspicion, controversy and, in general, lack of trustworthy information, about raw milk. There are obviously several players on different sides of the argument, all with their own piece of interest and point of view. Much like any animal product (or plant for that matter), there is always a percentage of population that are allergic or intolerant to something in the product. Dairy, whether raw or processed is no exception. We simply do not fully understand the composite chemistry of milk or how it reacts with the human system to have a sufficiently convincing argument either way. So, most of us resort to the safest course that we can think of, and, shy away from anything that seemingly did not get torched in the process of killing anything potential harmful. Even, if it comes at the price of losing the positive things as well. It is a choice each of us chooses or not.
If you are not a raw milk proponent, I am not going to attempt to convince you otherwise. If you are a raw milk addict, this is no sisterhood post. I love raw milk. That is my choice. And, mine alone.
Read MoreThe $0 Stock
This is, in reality, a
. But, I am going to sell the recipe to you as a weekend project.
If you read
carefully, you would have noticed that I slid this line, "Save the Peels", just like that. If you paused a moment there, this post will throw light. :)
You know that one ad that seems to be on repeat play around the Holidays, especially, Thanksgiving? STOCK!! Chicken, vegetable, beef. It is not a product that you would think has the greatest Holiday demand being such a mundane and humble product. While one would expect it to be an year round staple, it certainly doesn't seem to be and its need spikes during the latter half of the year, as evidenced by financials of stock and broth companies.
I believe that stock should be an year round staple in the pantry (fridge) for two reasons. First, the flavor it adds when you are making the simplest meals like soups, cooking grains or lentils, roast chicken, is simply fantastic. Second, it is super simple and easy to make at home for a next to nothing cost. This one product can help make your diet less processed and as clean as possible without preservatives or other additives. Besides, hey! No label reading required because you know what went into it.
Well, by now, you have gathered that today's recipe is Stock! :)
Homemade Vegetable Stock
.
Many recipes that you see around ask you to use whole vegetables to make the broths and stocks. That, I think, is an utter waste of perfectly great produce, especially, if you shelled out for the organic variety. And, it is contrary to the age old wisdom of making broths. Historically, stocks and soup were made with leftover bits and pieces. This was home economics in its true and amazing form.
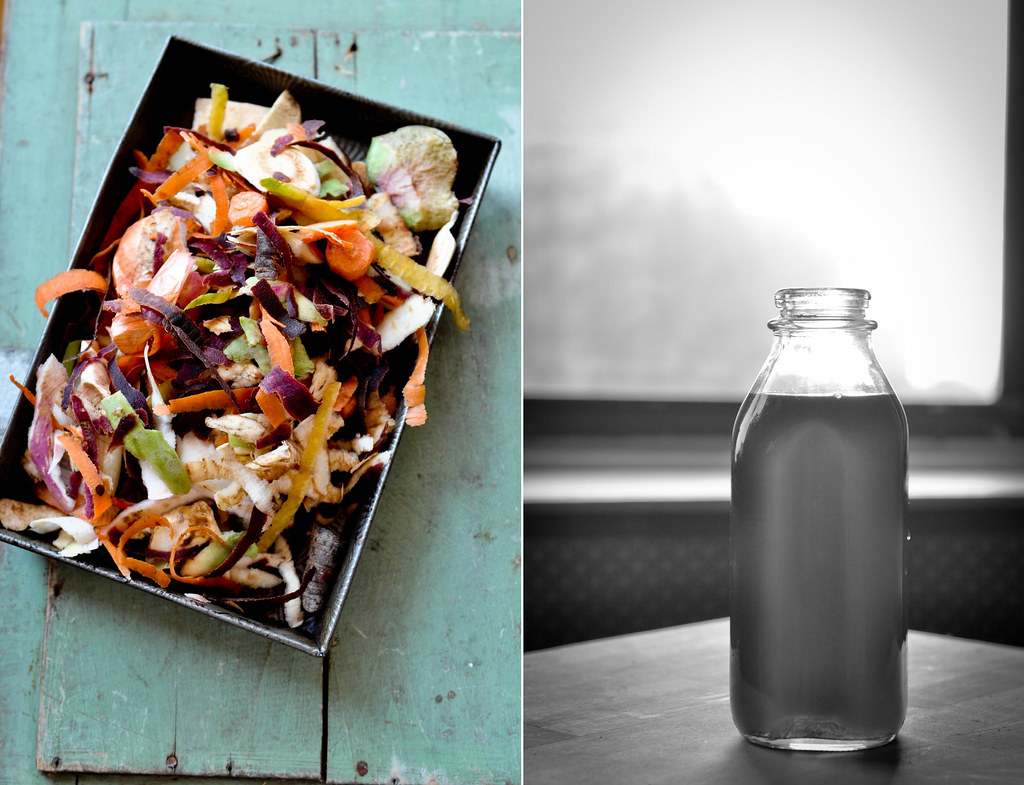
Whatever way you are cooking your vegetables, it is inevitable that you will have the peels and bits that didn't go into the dish (like carrot tops). All of those bits, root vegetable peels, onion and garlic skins, herb stems have a lot of nutrients and flavor that can easily be extracted by making broth. Do NOT bin them. Store them in a ziplock bag that is not completely sealed, so they can breathe and stay fresher. You can store them in a fridge for 2 days or in the freezer for unto a month.
For meat broths, reserve the bones after cooking. That is all you need. Skins without the fat are fantastic for this. You can use a bit of animal fat but not a lot of it because the fat adds little flavor and too much grease and isn't going to taste great.
Another tip I would give is to use stems of woody herbs like thyme and rosemary to flavor the broth rather than the leaves which are more expensive. You would be surprised how much flavor resides in the stem of a plant.
The bits you should NOT USE are those that are rotten or non-aesthetically damaged. Do not use spoiling meat. Brothing is not a way to resurrect fading ingredients. It is a way to make the most of good stuff.
Reader Tips
From Ivan: Roasting meat bones before boiling in stock helps make a less cloudy stock.
Do you have any tips on how to make good stock? If so, please share in the comments and I will add here with due gratitude!
Oh, and the best part of making stock at home is that you can make whatever flavor you want with what you have on hand. It is fun and brings so much variety in the flavor of the dish you make with it. A chicken soup can be bright and refreshing or deep and satisfying depending on the flavor of the broth that makes the base of it.
I would recommend, making this in bulk because it has a long, very long, freezer life. And, you don't have to do a last minute grocery store run!
Note:
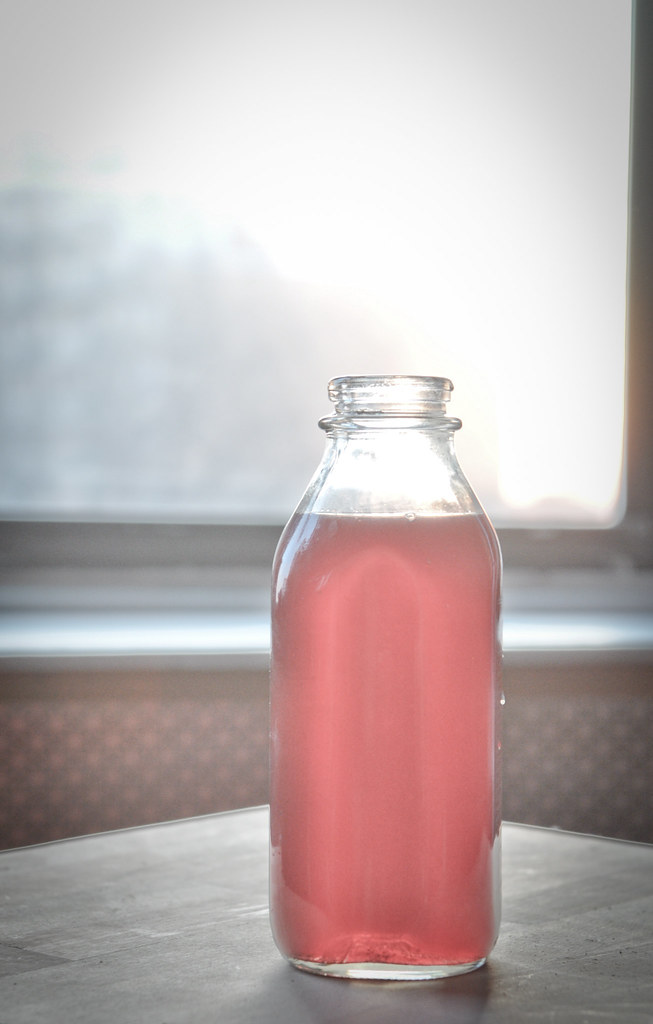
My stock is red in color because I used scraps of beets and purple carrots. If you do not want colored stock, use mostly white vegetables. Leaves and carrot skins do not color the final stock. They simply bleach as they cook.
So, there is your weekend idea! :)
What do you say? Want to make some stock? Scroll down for the recipe.
Nerd ALERT
, skip if not interested
The Business of Stocking
While doing some research, I picked up some interesting facts about the stock and broth market from the financials of the companies in the segment.
is the leading brand in the prepackaged broth industry and their results show a burgeoning growth in this segment with second half earnings last year showing a huge bump in broth sales relative to the first. Interestingly, the company recently changed their positioning and marketing strategy to cater to an increasing desire to cook in the market. While they use to sell the broths as the end all be all for making a turkey taste fantastic, they are now focusing on how the products aids the process of cooking. As a result, Net profits for the U.S. Simple Meals segment that includes broth and soup categories, grew by 18% in 2013. Swanson broth alone grew by 5% in sales propelled by the sub category of concentrated and flavored broths.
Since 2011, when they started investing more in this segment, their stock price has nearly doubled. Their stock is being driven by stock!
Now, if you are a shareholder at Campbells, this may seem brilliant news. But, be warned, the sales trend is a hump not a plateau or incline. As cooking becomes more backward integrated, broths and soups becomes less of a store bought staple. If this segment accounts for two-thirds of company profits now, and, that number is trending up, I would start thinking about selling the stock (shares) in 2-3 years time, unless they change their product strategy.
Homemade Vegetable Stock
There aren't as much measurement as indicative amounts in making this recipe. There is no wrong amount. If the stock is too thin, you can reduce it down further to concentrate the flavor. If it is too thick then add more water.
The spice mix I have included here is also suggestive. Use whatever you like or have.
I do not add salt in making stock, preferring to adjust in the final recipe.
2 cups of leftover vegetable scraps (skins, peels, stems, fronds, mushroom bases)
6 cups of water
1/2 tsp coriander seeds
a chuck of ginger with the skins (if it isn't already in the scraps)
1 tsp whole peppercorns
4 cloves
a few bits of rosemary stems (and the drier leaves if you have them)
Put everything in a pot and bring to a rolling boil. Lower the heat to a simmer. Close the pot and let is simmer away for about 30-45 minutes until the liquid has reduced in half. Taste the broth and check the flavors.
Take the pot off the stove, let it cool a bit. Strain the stock.
Store in a non-reactive container either in the fridge for upto 2 weeks or in the freezer for unto 6 months.
The Second Pantry
It struck me that food bloggers have a special kind of pantry. Of course, given food comes first in the description, we have one similar to every one else that is filled with spices, jams, canned items and what not. But as bloggers, we also have a second one - in our hard drives, that store of photos and recipes that we keep to use when needed..
Just like the first pantry, there are items in there that we had loving stashed, sparingly using the contents with the full intention of delaying gratification. Except, we forgot we put them there. While they patiently waited to be revisited, we moved on to newer, shinier things or just moved really.
When I moved apartments a few weeks ago, I was appalled at the amount of stuff, I had hoarded, over my seven years' stay in the same apartment. Despite, my continuous attempts at spring cleaning, at least my fridge and pantry, I still found condiments I had picked up in Australia during my visit in 2010. There was that wattleseed powder that I had good intentions of making an ice cream with and never did. There were also spices from India, accumulated over several visits that I think I never had the heart to throw out and justified that non-action with, well, it is still better than the insipid grinds I get here.
Moving gave me the perfect excuse to get up to date with my first pantry. There was an economic cost to every item I was packing, and being mindful of the till ringing up, I was very prudent and stringent. Despite that I already have a full pantry in the new place. And, I have resolved to resist the urge to add storage space, buy more items than I could possible consume and fall back into a hoarding pattern. Since I have an open kitchen layout with no way hide mess and clutter, it has been very effective.
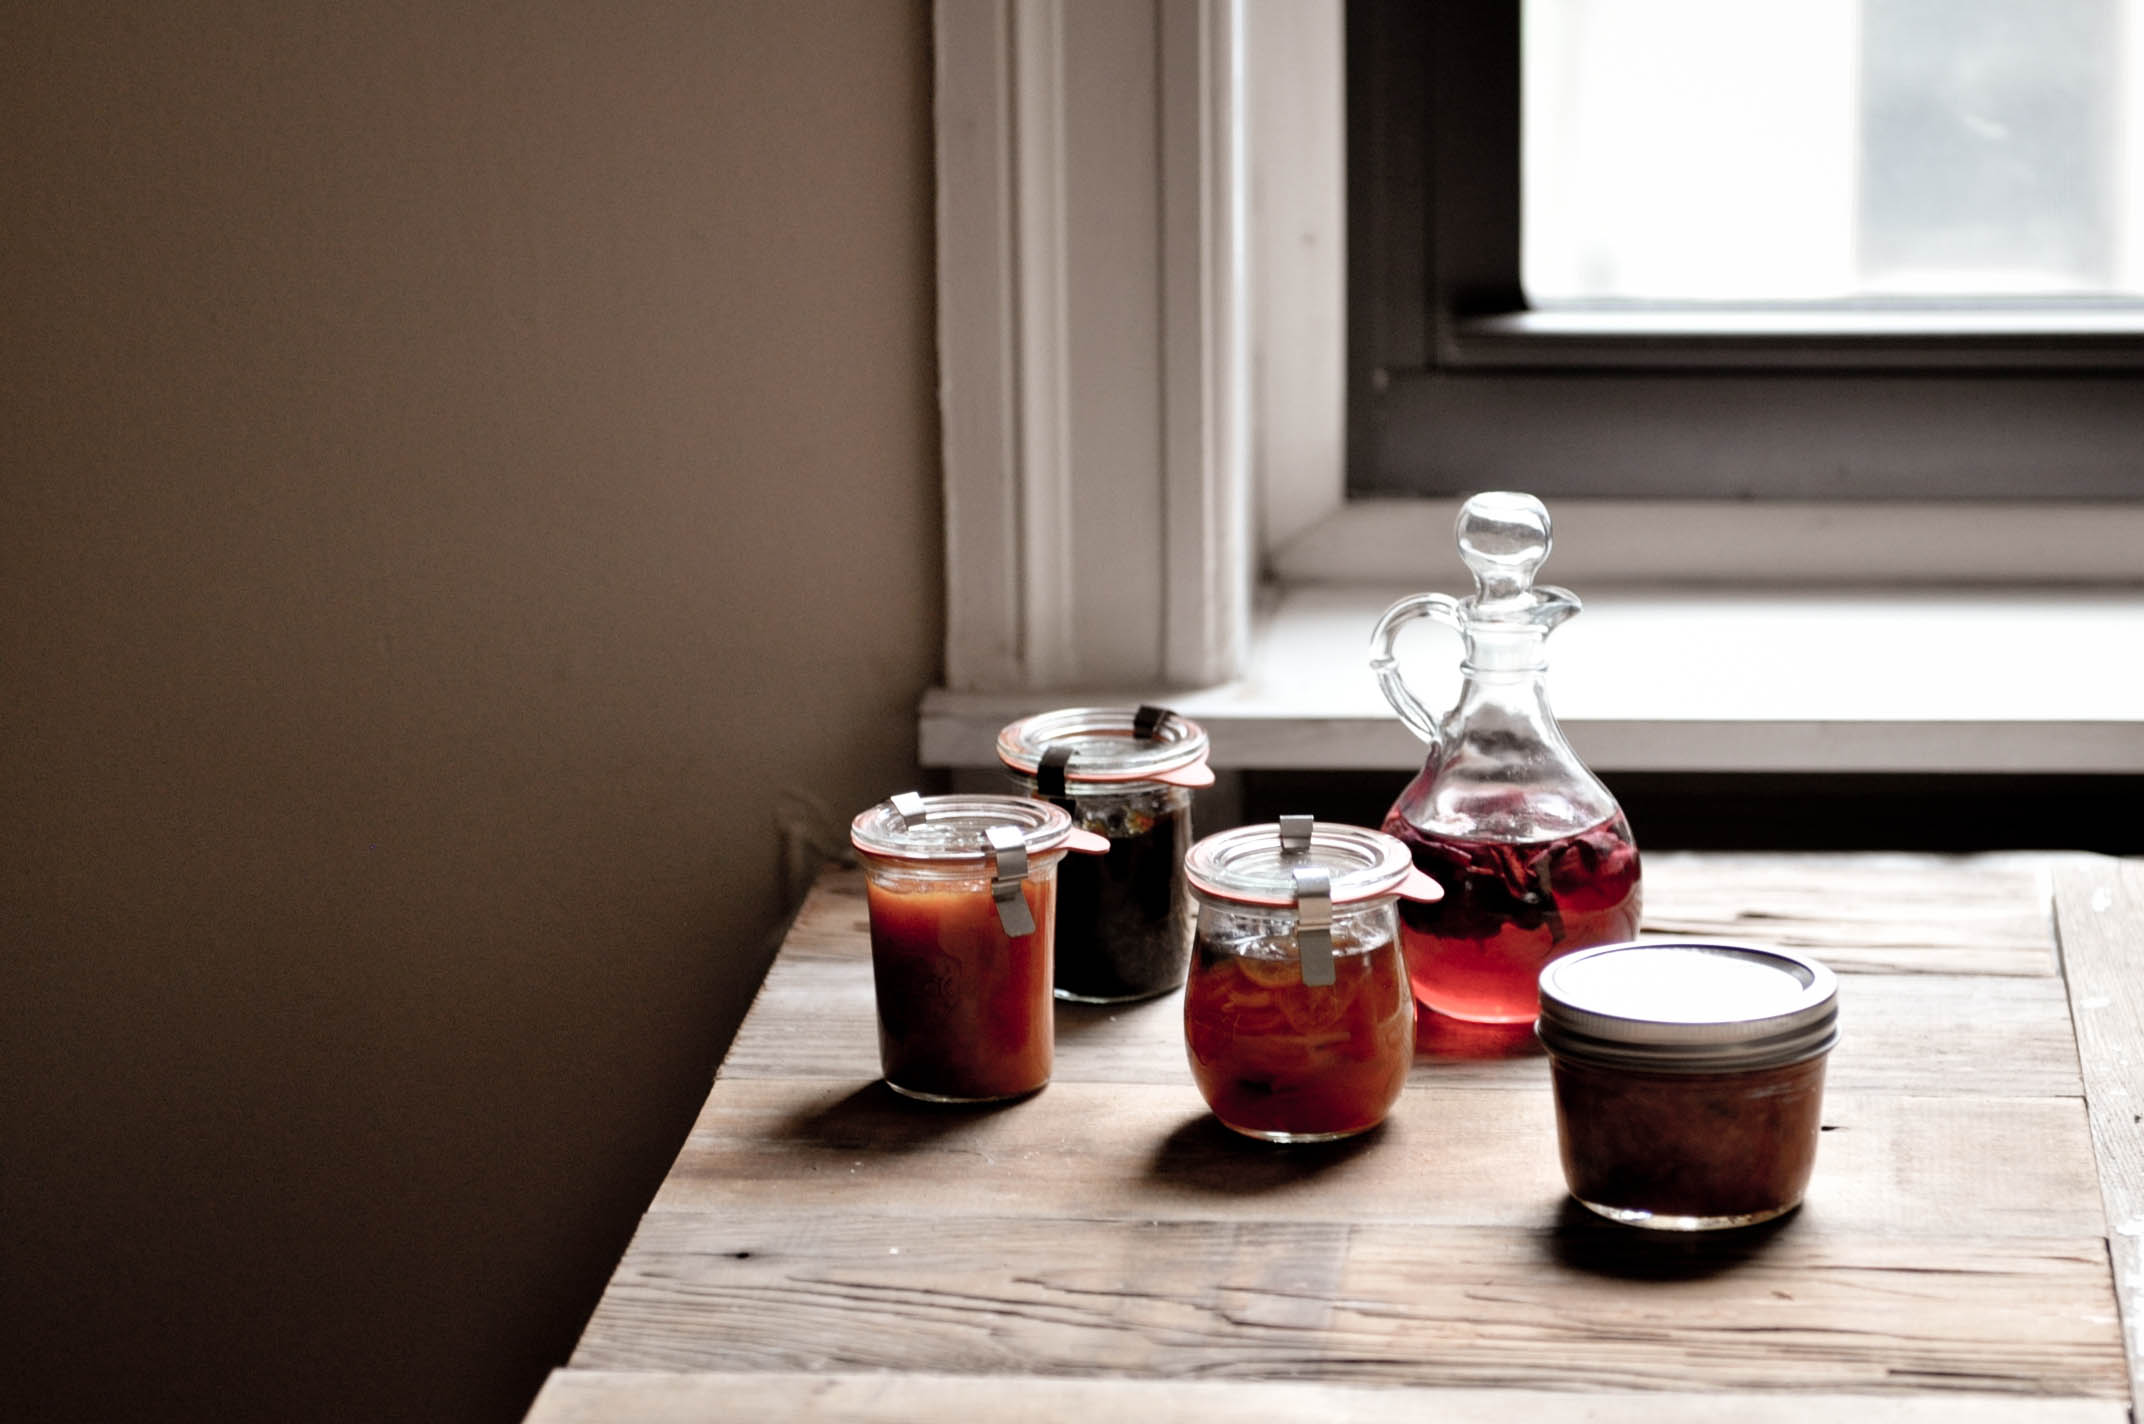
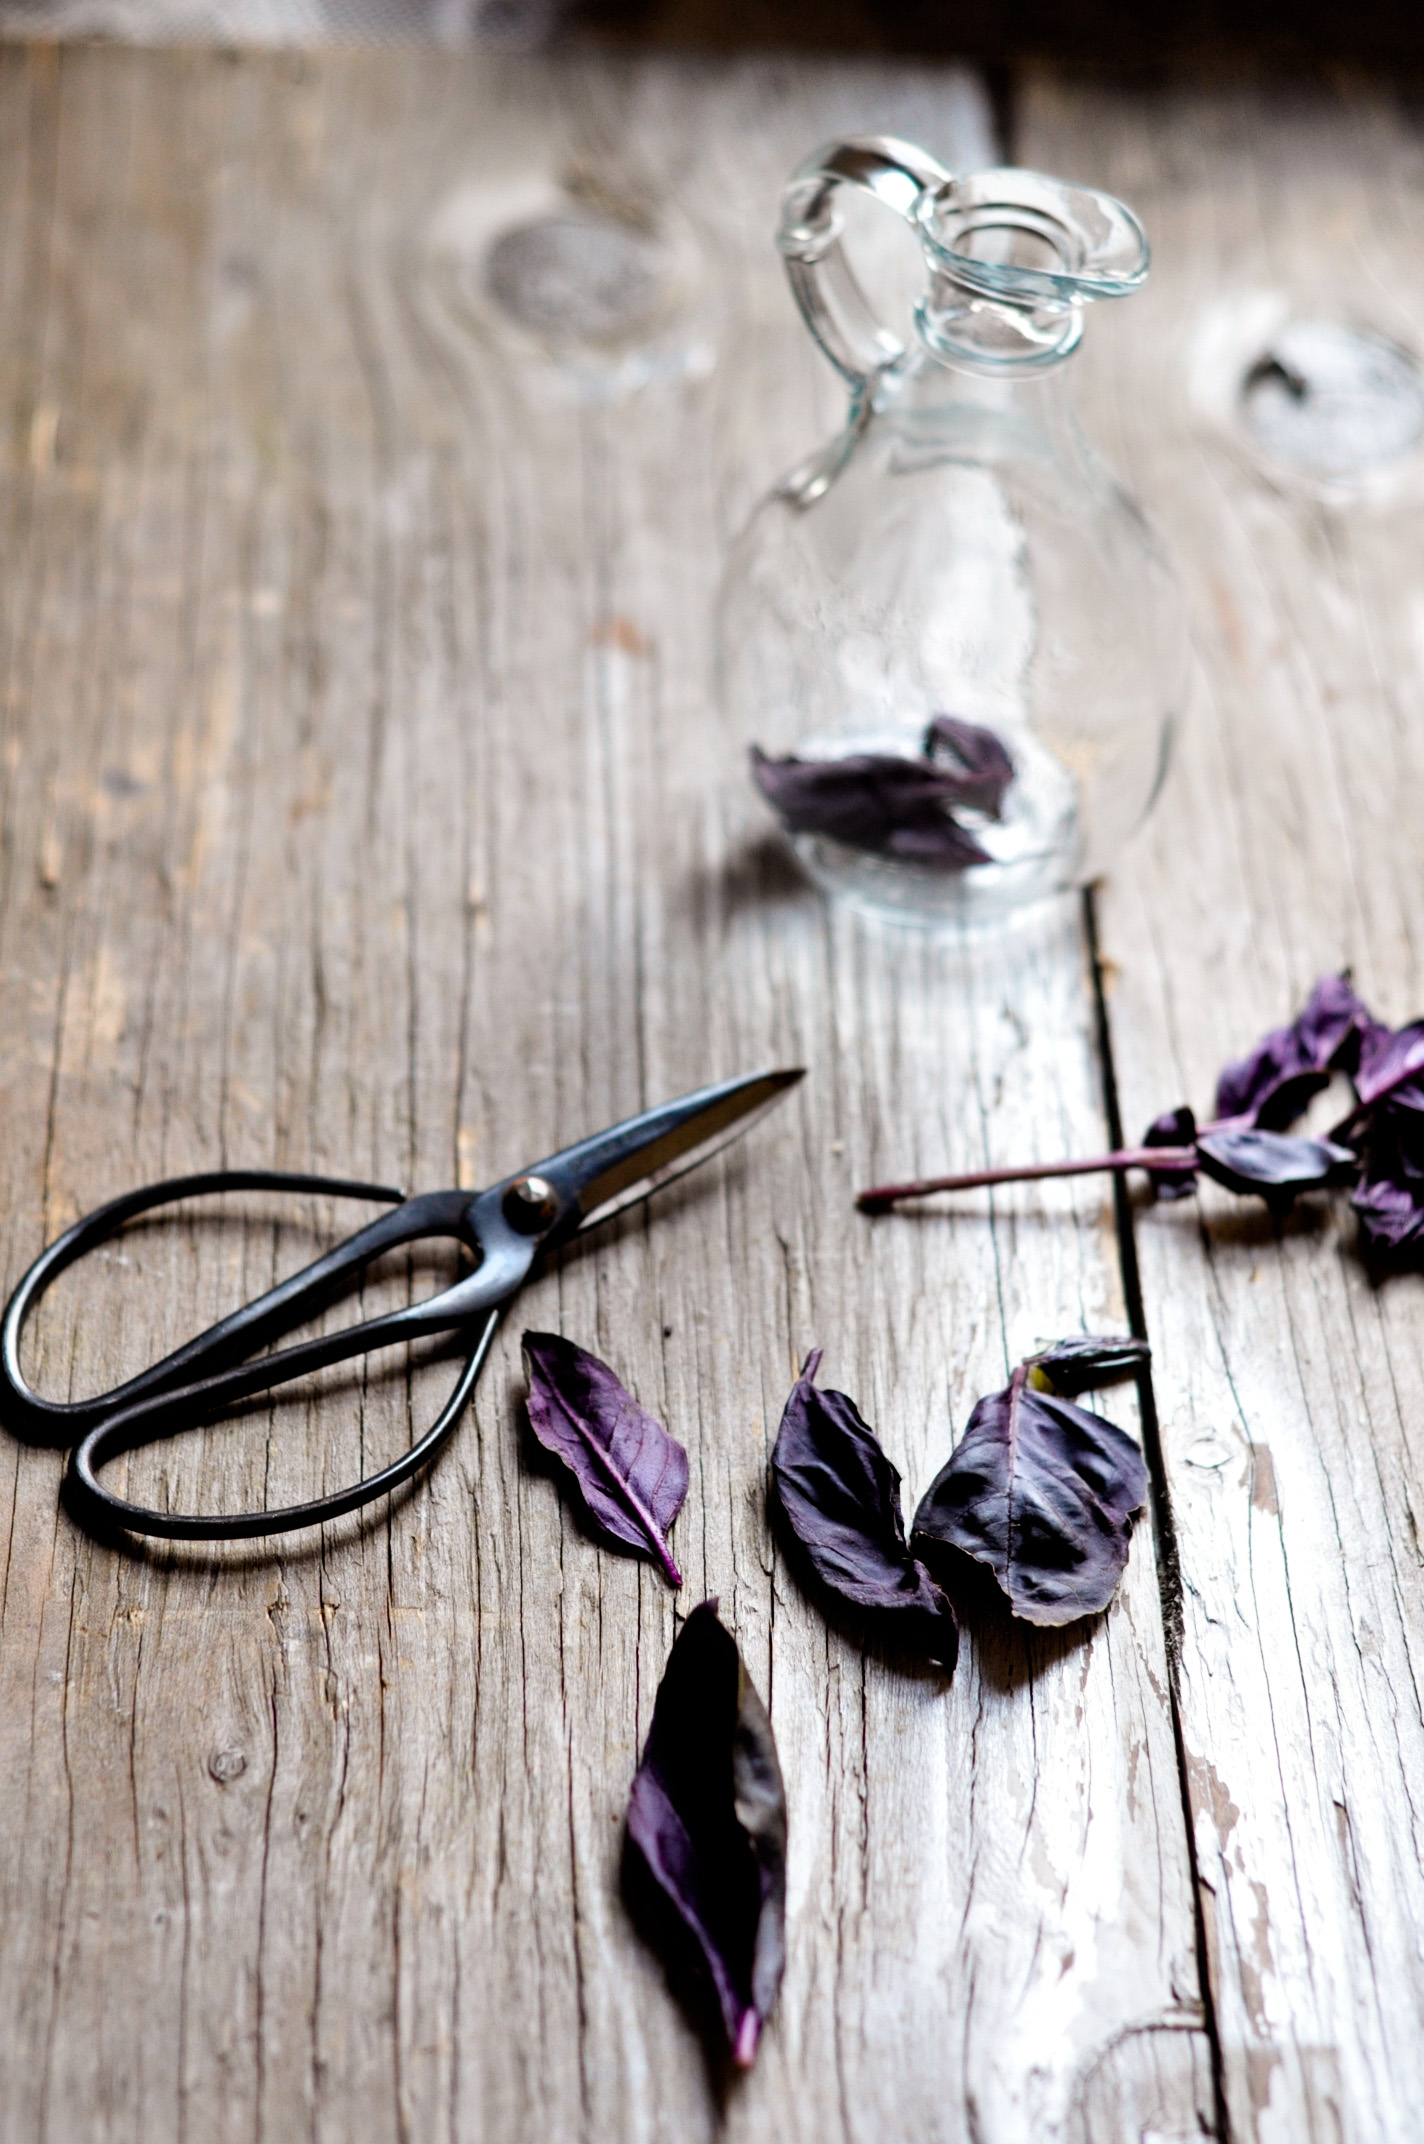
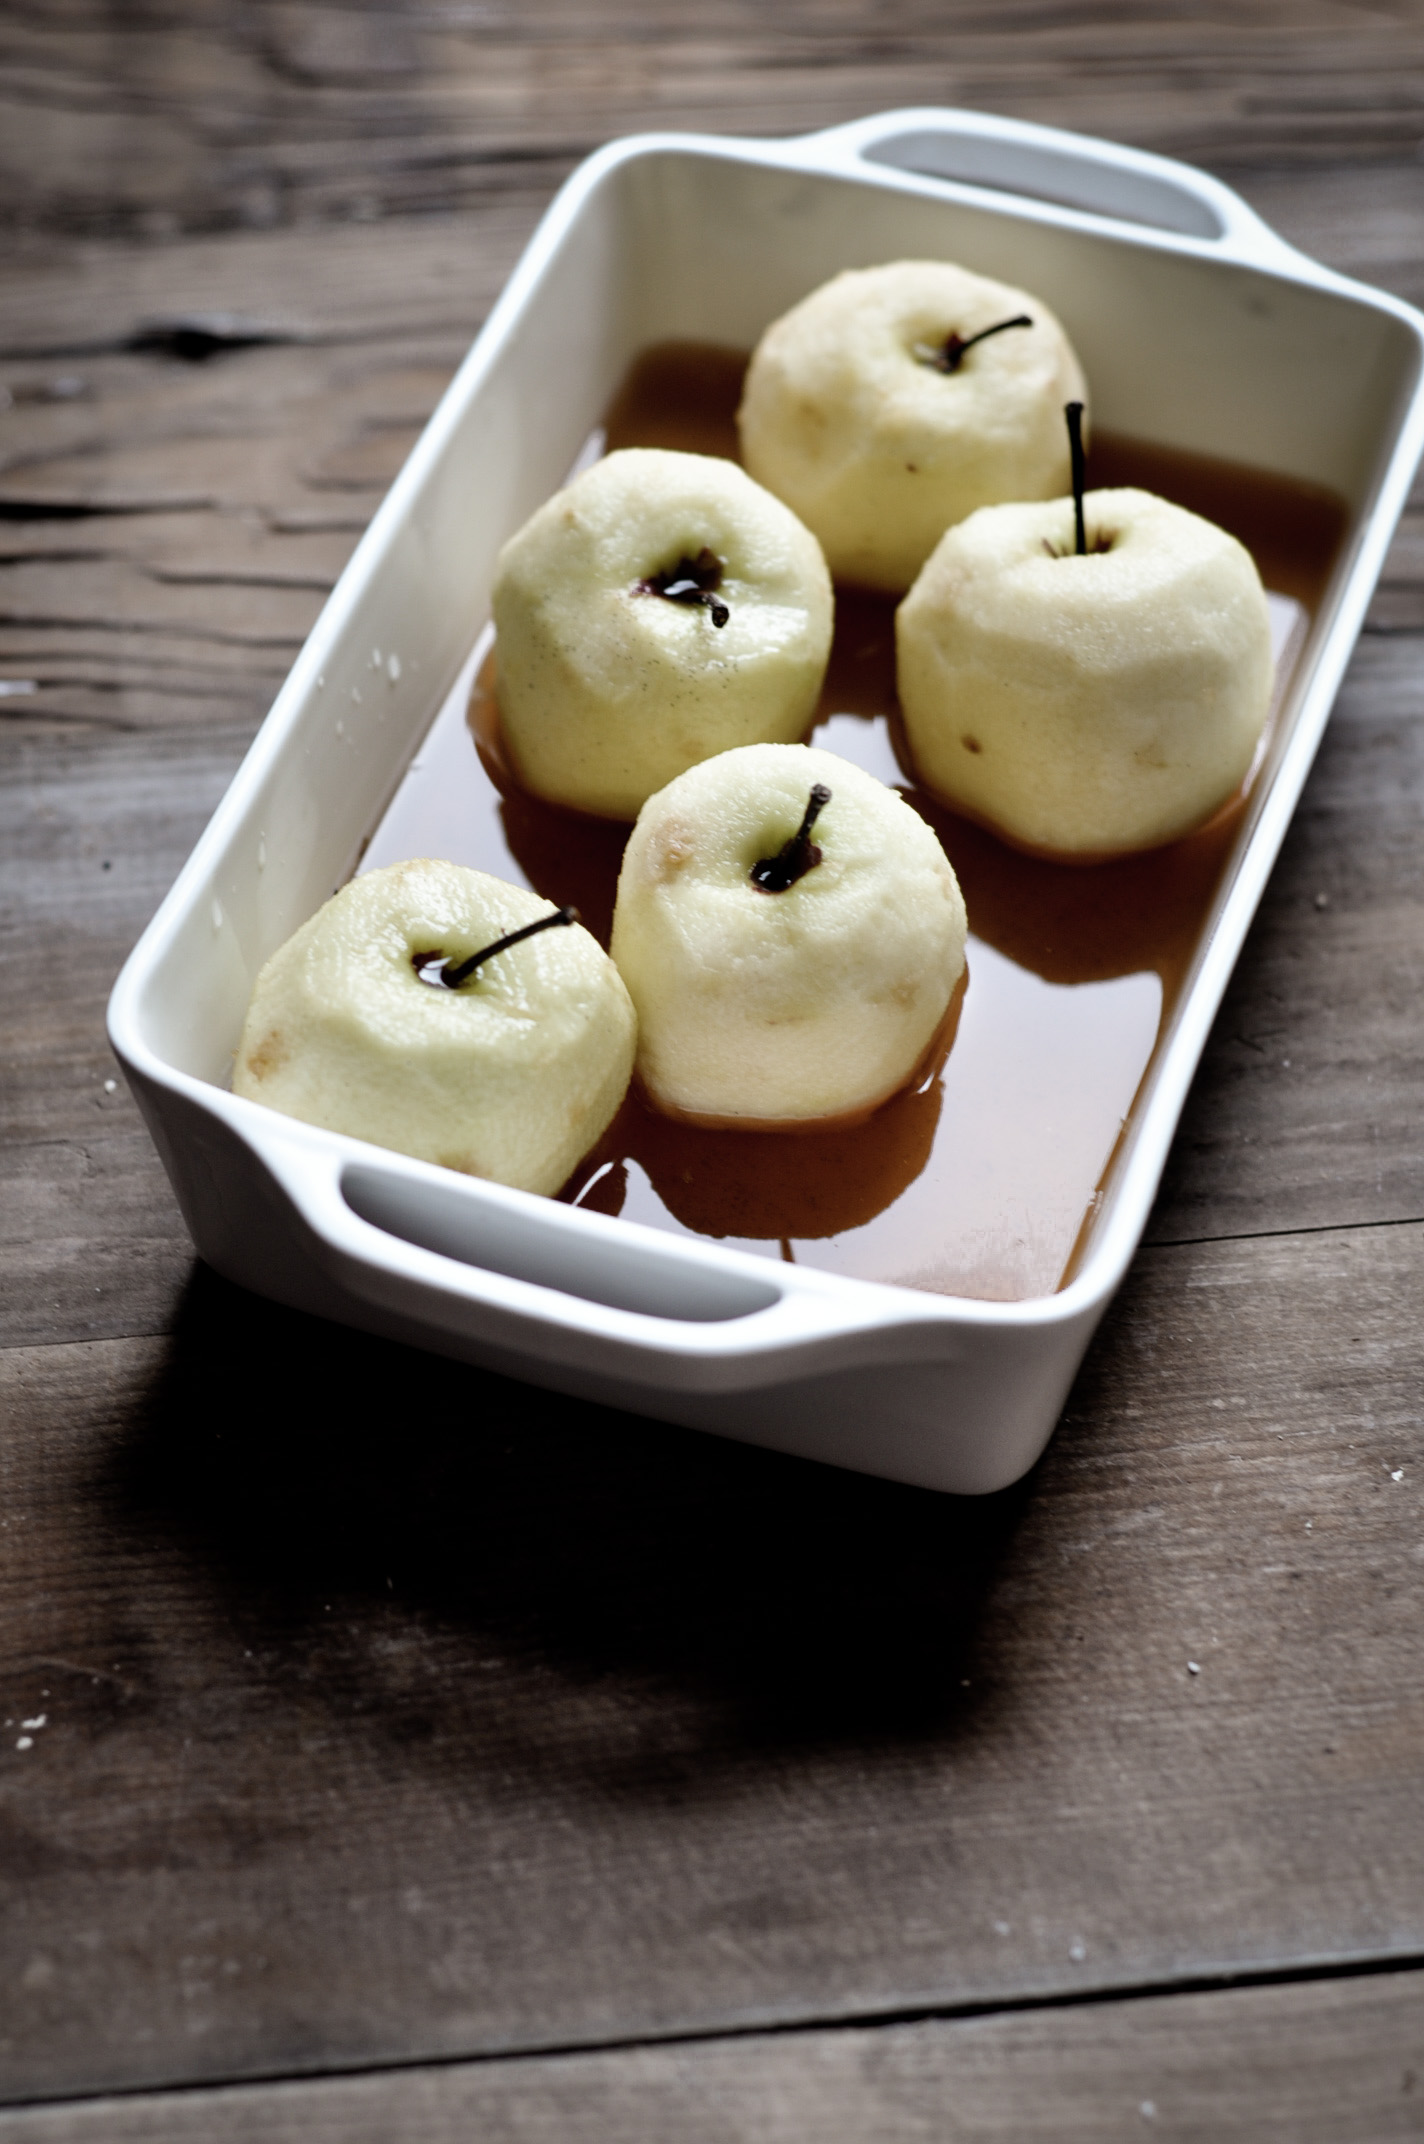
Last night I was backing up files and felt a sense of deja vu! There they were. Files and folders tucked away within others that I hadn't looked into for months. Photos and recipes, from earlier seasons, I had meant to post. That gorgeous herby vinegar or those vanilla infused apples or that mousse cake! And, I have whole host of stuff to share from my Artisanal Bread Baking class at the ICC!
I am going to start now. Cleaning. I'll probably not get down to zero. I am sure I will keep adding more to the pantry and using less of it than intended. But, I will use them all up eventually, I promise.
For now, I leave you with a few treasures for your first pantry from my second... :)
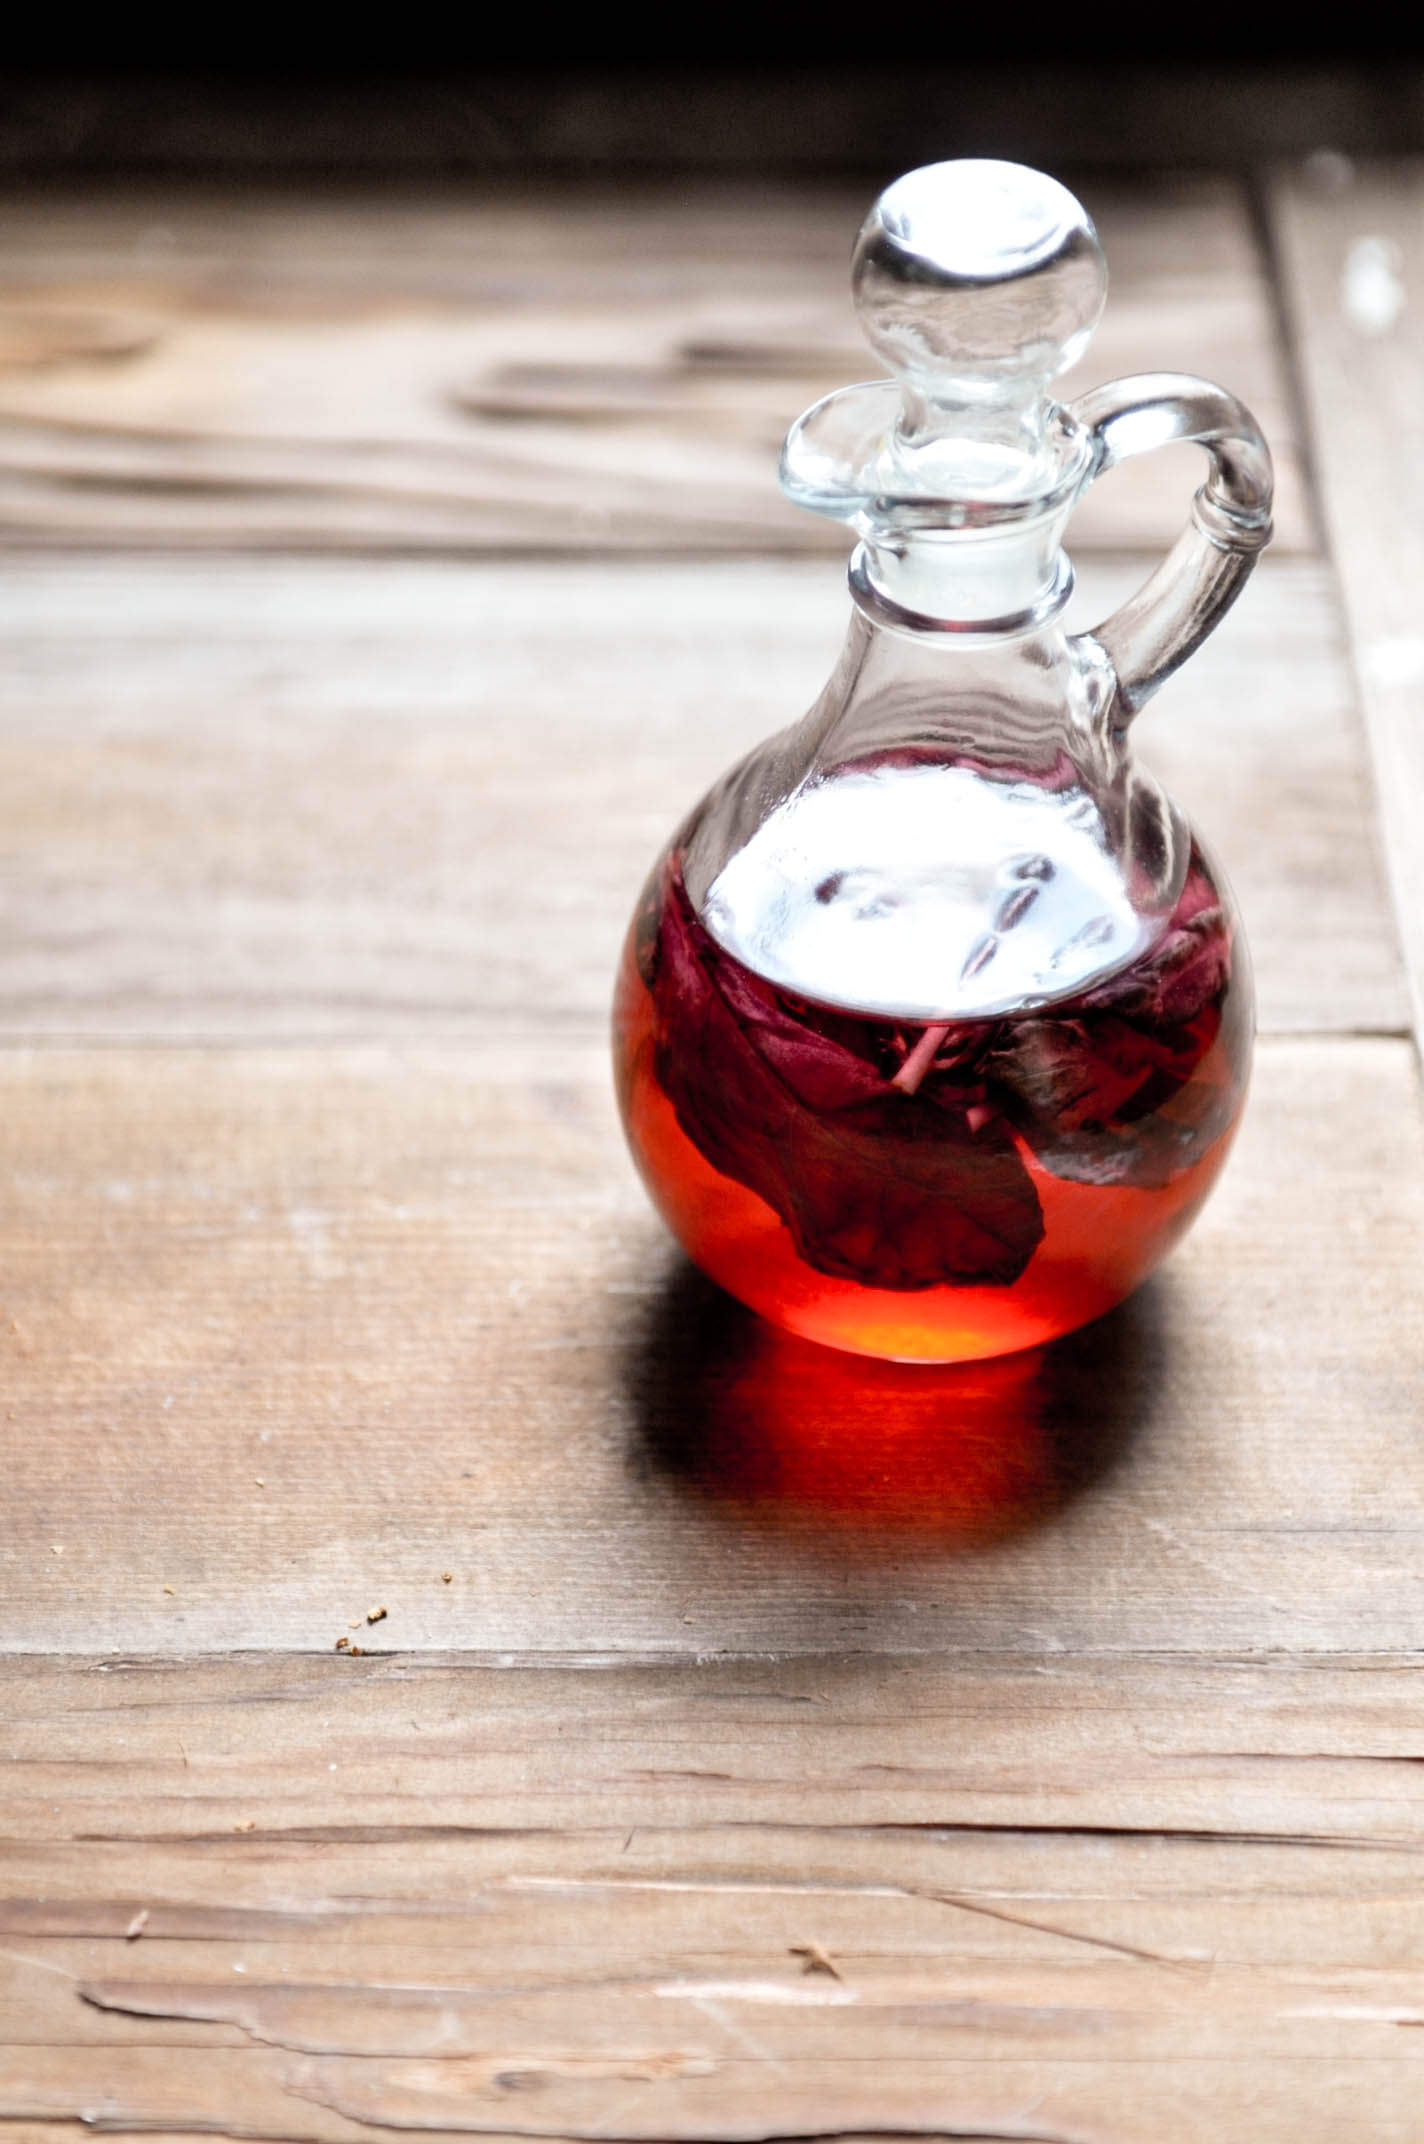
Purple Basil Vinegar
1/2 cup white vinegar
1/4 cup water
3 T honey
1/2 tsp salt
handful of purple basil leaves
Bring all the liquids to a soft simmer. Meanwhile, drop the leaves and salt in the container you want to store the flavored vinegar in. Pour the hot liquid on top. Cork the bottle and store in a cool, dark place for a 2-3 days before using.
Stays in pantry for ages!
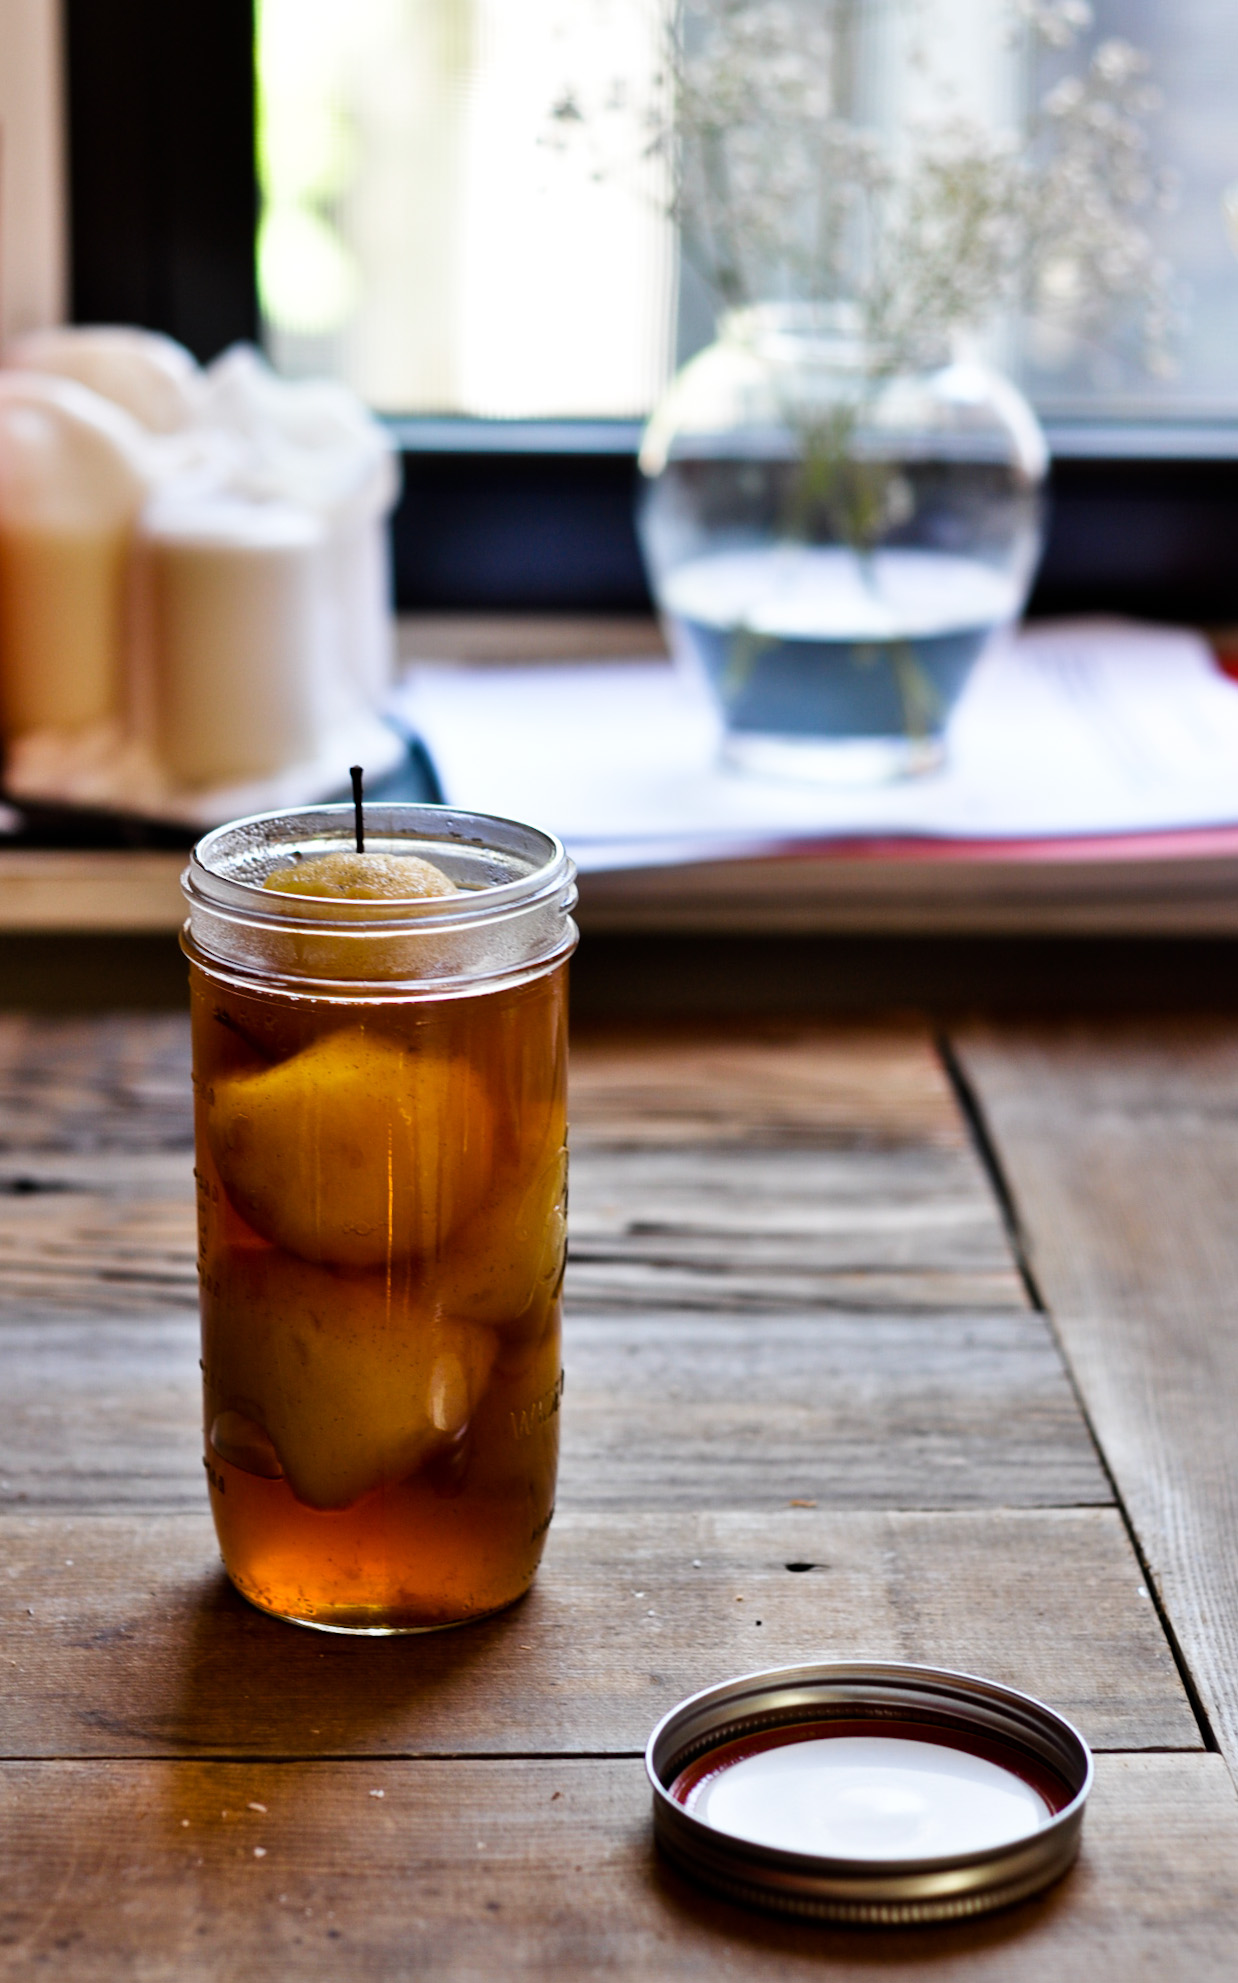
Vanilla Poached Apples
{This is a super easy make-ahead awesome dessert. You can serve it warm or cold with a huge dollop of ice cream or whipped cream. Or for a balance of flavors, try it with sour cream.}
________________________________
5 firm apples, peeled (It is better not to core them as it gives the poached fruit more integrity)
1/4 cup apple cider vinegar
3 T honey
1 tsp vanilla bean paste, or seeds scraped off half a bean
Enough water to cover the apples
Preheat oven to 375F.
Arrange the apples in one layer in a baking dish. Pour enough water to come up to half the height of the apples. Add the honey and vanilla. Cover the dish with foil and bake for 30-40 minutes till the fruit is just soft.
Gently scoop each fruit out and lay into the canning jar. Pour the liquid on top of the apples until it covers the fruit entirely. Seal jar per canning instructions.
Cool to room temperature and then refrigerate.