mushroom

Mushroom Focaccia

Whole Mushroom focaccia

What do you do when you go to a book store? Do you go with a plan and a list of titles that you want to look up/buy? Do you go there with a vague idea of browsing around, have a cup of coffee, bite a sample off a few a books, while your time and just you know, spend a lovely afternoon in the company of words?

Well, I belong to the latter (clearly there was no doubt of that given the previous sentence!!:D). So, yeah, I am guilty of thumbing through quite a few intoxicating fresh with ink pages and walking out happy without having bought a single thing. In my defense, I almost always buy coffee and snacks, I am not much of the crouch in the corner kind....Anyway, I find it so much more satisfying to turn pages than click away on sites. So libraries and book stores are my happy places.. :)

cartoon credit: cartoonstock.com

A few days back, Melody of the gorgeous Gourmet Fury, had shouted out the theme for the latest version of her Beet 'n Squash You series - Battle Mushroom! Mushrooms are one of my favorite ingredients to play with. So, I was looking forward to creating something for the battle!


So, there it was, in the back of my mind; I had promised her an entry this month. And, I wanted to do something with bread (Yeast is a heady culinary aphrodisiac, don't you think?!). So I mulled over breads with mushroom inside or outside and finally settled on focaccia. Why?! Just because it's one of my all time favorites, Mr. FSK simple loves it, it was the first ever bread I made (so has that sentimental pull ;-)) and for some odd reason I was seeing a lot of focaccias in the food blogosphere and that peer pressure is simply hard to resist! :D

Focaccia collage

I have heard much about Peter Reinhart and his book The Bread Baker's Apprentice. Not owning a copy, I skipped off to nearby B&N, to do some research and yes, shamelessly copy the recipe! In passing, I found another book on breads whose name I have honestly forgotten. So, I took down both recipes. Peter's needed a bit more mothering than the other and since I was running a bit short on time, I chose the mysterious other recipe with a few suggestions from Peter's. I promise to make a note of the name next time I scrounge around in B&N and update you guys.

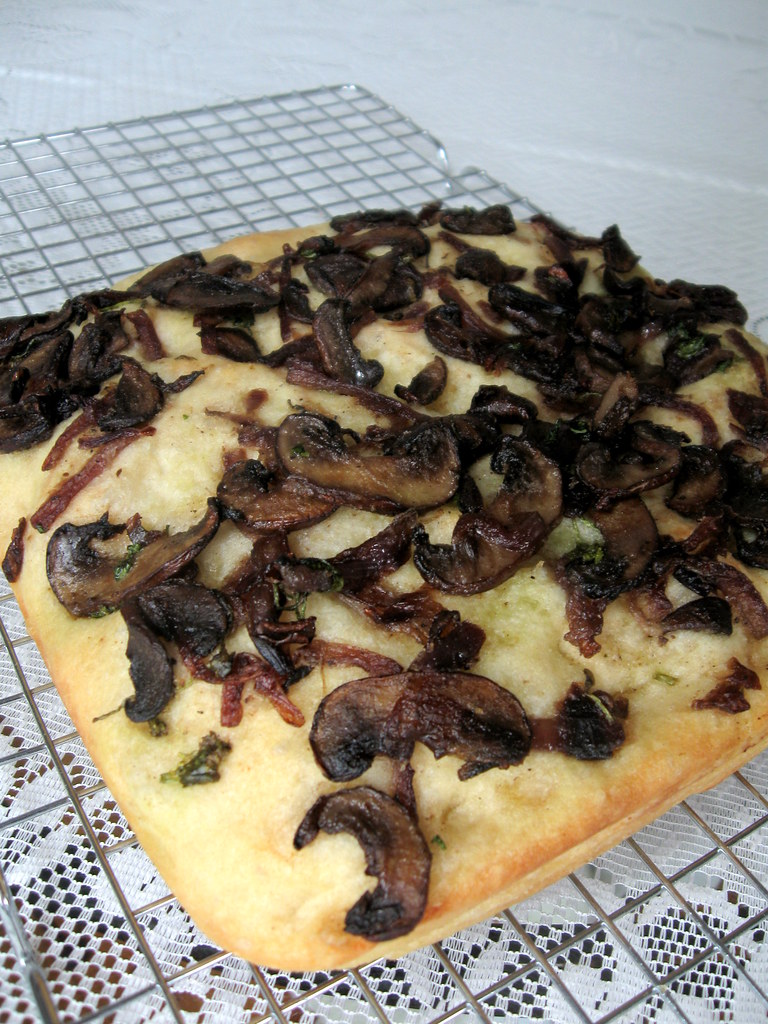
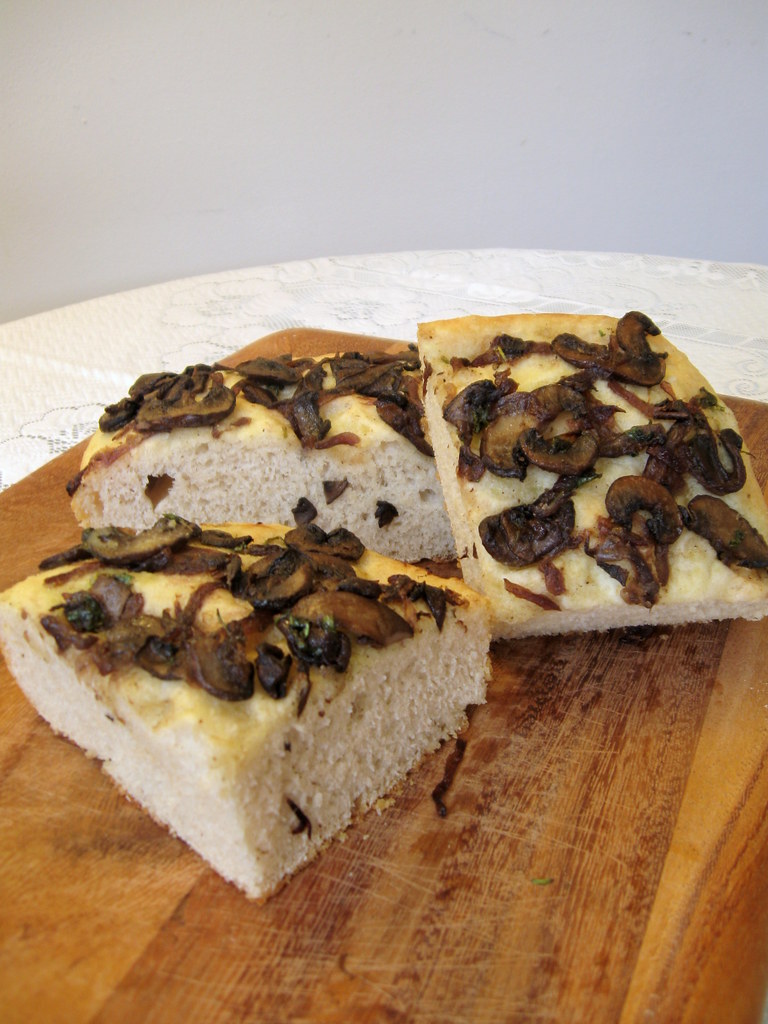
So, anyway, I made a simple, no-frill focaccia topped with lightly sauteed mushrooms. Clean flavors, letting the mushrooms play the dominant flavor, as was intended for the contest. The thing about this recipe is that its starts of with a base for making ciabatta and then modifies it for focaccia. Which is kind of good value - two birds with one stone and all that. Anyway, my point was that the bread comes out denser than usual in looks but still as light as air. Ofcourse, you can also spread it thinner, it get the more traditional look!

Mushroom focaccia sliced

Also, sending this our friendly,neighbourhood Yeastspotting team!


Mushroom Focaccia
(makes one 10 inch round)

Biga
1/2 cup (2.13 oz) bread flour
1/6 cup (1.3 oz) warm water
pinch of instant yeast

Dough
Scant 2 cups (1/3 lb + 3.2 oz) bread flour
5/6 cup water
1/3 T salt
5/12 tsp instant yeast
Biga (from above)

1/2 cup sauteed mushrooms
1/3 cup olive oil

To make the biga:

Disperse the yeast in water, add flour and mix until just smooth. Biga should be stiff and dense but add a few drops of water if too stiff. Cover twith plastic and leave for 12-16 hours at about 70F. When ready, the biga will be domes and just beginning to recede in the center.

For the dough:

Add all the ingredients to mixing bowl except the biga. Mix to incorporate. As the dough starts coming together, add the biga in chunks. Dough will be sticky and slack. Continue mixing till there is some gluten developed but the dough is still loose and sticky. Internal dough temperature should be 75F.

Place dough in an oiled bowl, cover with oiled plastic wrap and let rise for 30 minutes. Turn the dough onto a floured surface and gently pat into a rectangle. Fold the dough business letter style along the long edge. Spray the top with oil, dust with flour, cover with wrap and let rest for another 30 minutes. Repeat process 2 more times.

After the final 30 minutes of bulk fermentation, above, transfer to a 10 inch cake pan that has been generously oiled with olive oil. Dimple the dough lightly with finger tips (only!) to spread the dough to the shape of the pan. Don't worry if it doesn't fit exactly; it will after rising.

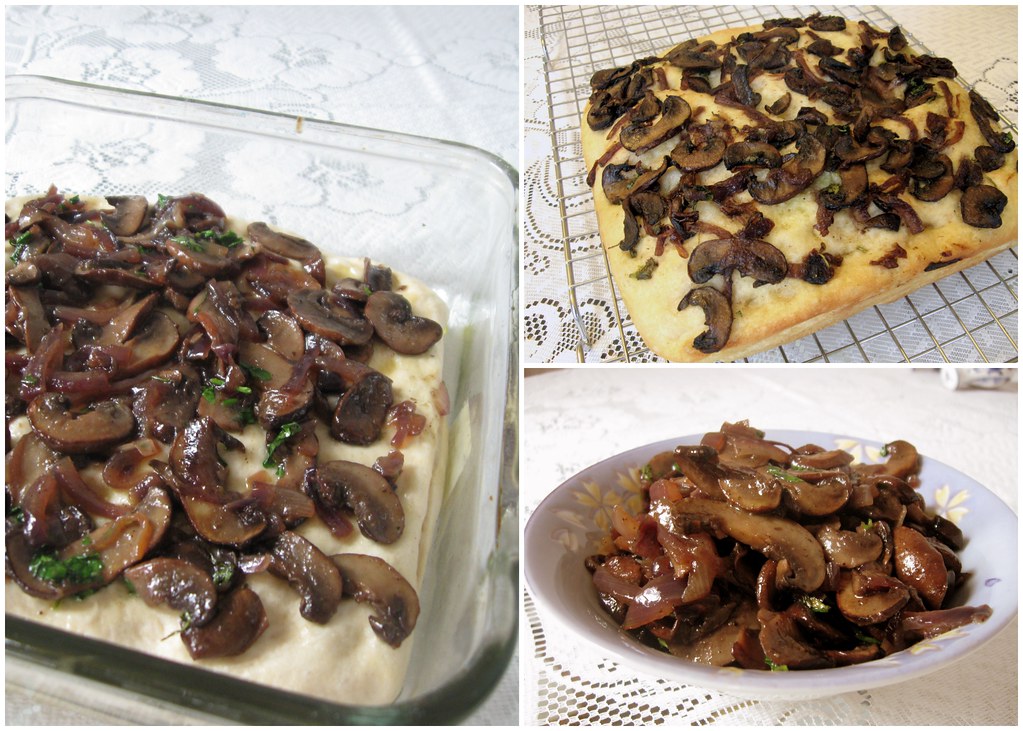
Spread the sauteed mushrooms lightly over the focaccia. Pour 3/4th of the remaining oil evenly over the top. Cover with an oiled wrap and allow to ferment for an hour and a half until doubled in size. About 15 minutes before it is ready preheat oven to 475F.

Pour the rest of the oil over the top. Pop the pan into the oven, reduce heat to 450F and bake for 25 minutes until the sides and bottom are browned and crusty.

Transfer to rack and cool for a few minutes. Slice into a still warm focaccia, dip in fruity olive oil and relish!

Daring Bakers - Vols-au-Vent


I am sooo excited!! I recently joined the Daring Baker's group and this month I completed my first challenge. Daring Kitchen is a great collection of culinary enthusiasts who challenge themselves to create some exotic item every month. I have been following some of my favorite bloggers recreating some fabulous baked goods and I finally decided to take the plunge! :)

The September 2009 Daring Bakers' challenge was hosted by Steph of A Whisk and a Spoon. She chose the French treat, Vols-au-Vent based on the Puff Pastry recipe by Michel Richard from the cookbook Baking With Julia by Dorie Greenspan.

Oohhh!! Puff pastry... How many times have I happily used the frozen ones from the store for a quick appetizer, canapes or dessert?! It is one ingredient that is a staple in my freezer. And, now, I appreciate the effort and skill required to get that rectangular piece of dough that transforms into the beautifully flaky and richly buttery pastry.

Some background on puff pastry from our hostess:

Puff pastry is in the ‘laminated dough” family, along with Danish dough and croissant dough. A laminated dough consists of a large block of butter (beurrage) that is enclosed in dough (détrempe). This dough/butter packet is called a paton, and is rolled and folded repeatedly to create the crisp, flaky, parallel layers you see when baked. In the hot oven, water in the dough and the melting butter creates steam, which expands in the trapped air pockets, forcing the pastry to rise.


A vols-au-vent, as you might have guessed from the photo, is a pocket/cylinder of puff pastry that is filled with savory or sweet filling. Depending on which course you want to serve them, they can be of appetizer or main course sizes. I have a

I decided to do bite sized savory and sweet portions for this challenge. Now, that was another challenge! I pondered over what filling to make for like a week, even dreaming up flavors in my sleep. (yes, yes, I know.. I am that crazy!). Finally, I settled on mushroom mousse and shrimp orzo filling for savory and a simple lemon pudding for sweet.

Mousse just seemed to go with the French-ness of the pastry. And, mushrooms automatically lend themselves to little bites. I kept the mousse simple using just sauteed mushrooms and shallots and folding in goat cheese (which, I picked up at a Dutch festival in the city) to create the texture of the mousse.

I thought my first batch of pastry did not puff up as prettily as the store bought dough does. I tried again. The result wasn't very different and I suspect that it was because I halved the recipe and so, the measurements got skewed in the process and the butter was over processed into the dough. So, note: If you are planning to make puff pastry using this recipe, make the whole batch and then use as much as you want. Puff pastry freezes very well, so you don't have to worry about it spoiling.

For second take, I took inspiration from my lunch! I had planned on making pasta for my lunch and I thought "Why not serve little bites of pasta in a pastry!". I mean pasta gets universal acceptance and the pastry casing just added that bit of elegance that carried it off as an hors d'oeuvre! :)

For the pudding, I used instant pudding mix (I did say simple!) and tuned up the lemon flavor with fresh zest. Topped off with dark chocolate shavings, it was just about sweet enough for a bite!

So, now that the challenge is done, I must say while it was an interesting experiment, I think I will stick with the store bought sheets henceforth ....

Please visit the Daring Kitchen, to see what other bloggers have designed for their vols-au-vents!


Mushroom Mousse Vols-au-Vents

10 2-1/4" vols-au-vent shells(recipe here)
1 pint cremini mushrooms, chopped
2 shallots, chopped
2 oz goat cheese, room temperature
1 tsp milk
1 tsp chopped chives for garnish
1/4 tsp paprika
1/2 tsp dried oregano
salt and pepper to taste

Saute the shallots and mushrooms in a tablespoon of olive oil until the water evaporates. Season with salt, pepper, paprika and oregano. Let the mixture cool and then blend in the food processor to a smooth paste. Whip the goat cheese with a teaspoon of milk until light and airy. Fold in the mushroom mixture into the cheese. Fill a piping bag fitted with a star tip (I used Ateco #864).

Pipe the mousse into warm vols-au-vent shells. Garnish with chives and serve immediately.

You can truss this recipe up by sautee-ing the mushrooms in white wine and using mascarpone or creme freche instead of goat cheese.


Shrimp Orzo Vols-au-Vents

6 2-1/4" vols-au-vent shells
handful of orzo
2 cups lobster/shrimp/clam stock
3 T marinara sauce
1.5 T sour cream
3 shrimps sliced vertically
1/2 tsp cajun seasoning
1/4 tsp dried parsley
salt and pepper to taste
fresh grated parmigianno regianno for garnish

Cook the orzo until slightly underdone in the stock. Heat the marinara sauce and add the drained pasta to it. Cook for a minute or two until pasta is cooked. Off the heat fold in the sour cream. Meanwhile, toss the shrimps in salt, pepper, cajun seasoning and dry parsley and saute until cooked.

Spoon pasta into the vols-au-vent shells. Top each with a shrimp slice, garnish with fresh grated parmigianno and serve immediately.